In this chapter, we will learn how to construct a private key by mnemonics
Build Private Backup Cipher
Add file seed-phrase-page.vue in the page directory. Some codes are as follows:
<template>
<div class="seed-phrase-page vertical-only-layout">
<header-bar />
<div class="horzontal-layout">
<div class="seed-phrase-main">
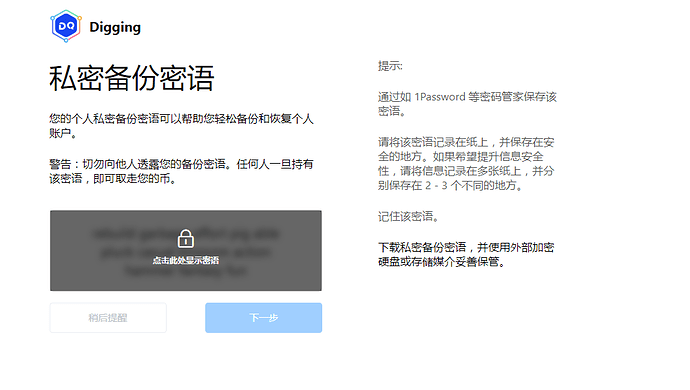
<page-title>私密备份密语</page-title>
<div class="text-block">
您的个人私密备份密语可以帮助您轻松备份和恢复个人账户。
</div>
<div class="text-block">
警告:切勿向他人透露您的备份密语。任何人一旦持有该密语,即可取走您的币。
</div>
<div class="reveal-seed-phrase-secret">
<div class="secret-words">
<!-- 显示助记词 -->
rebuild garbage effort pig able pluck casual blossom action hammer
fantasy fun
</div>
<div class="secret-blocker">
<div class="el-icon-lock"></div>
<div class="reveal-txt">点击此处显示密语</div>
</div>
</div>
<div class="horzontal-layout" style="margin-top: 16px">
<el-button class="seed-phrase-btn" :disabled="disableBtn"
>稍后提醒</el-button
>
<!-- 让两个按钮靠两边 -->
<span class="flex-1"></span>
<el-button
class="seed-phrase-btn"
type="primary"
:disabled="disableBtn"
>下一步</el-button
>
</div>
</div>
<div class="seed-phrase-aside">
<div class="text-block">提示:</div>
<div class="text-block">通过如 1Password 等密码管家保存该密语。</div>
<div class="text-block">
请将该密语记录在纸上,并保存在安全的地方。如果希望提升信息安全性,请将信息记录在多张纸上,并分别保存在
2 - 3 个不同的地方。
</div>
<div class="text-block">记住该密语。</div>
<div>下载私密备份密语,并使用外部加密硬盘或存储媒介妥善保管。</div>
</div>
</div>
</div>
</template>
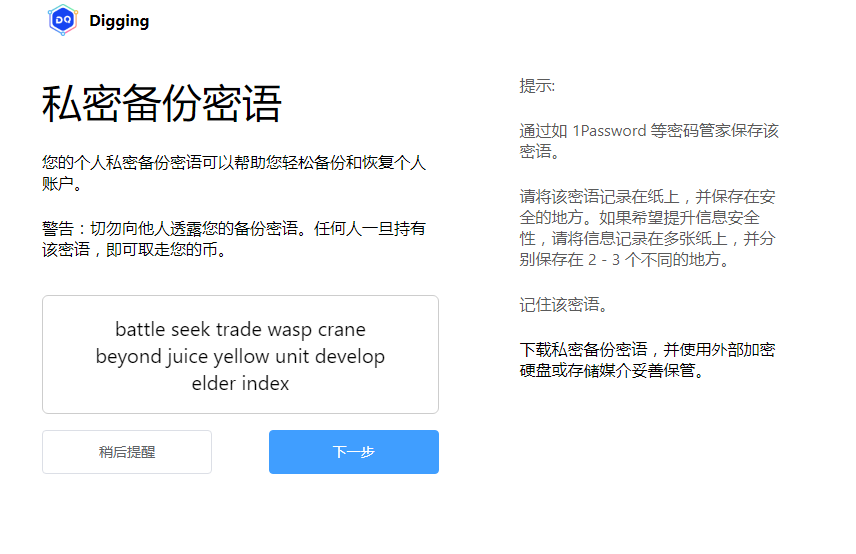
Recompile the project and you can see the following effects:

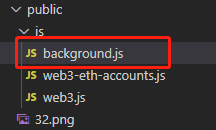
Before generating mnemonics, let’s look at how to save the password for creating the password page. Open the file background.js under public/js
Write PasswordManager . Some codes are as follows:
/**
 * 密码管理类
 */
class PasswordManager {
    // 密码解锁后,把密码保存在这里
    static password = "";

    static IsUnlock() {
        return !!PasswordManager.password;
    }
    /**
     * 判断密码是否存在
     * @returns
     */
    static async IsPasswordExist() {
        let password = await PasswordManager.getPassword();

        return !!password;

    }
    /**
     * 获取密码
     * @returns password
     */
    static getPassword() {
        return new Promise((resolve) => {
            chrome.storage.local.get(['password'], (res) => {
                // errCode为0是表示
                console.log(res);
                let password = res['password'];
                resolve(password);
            });
        });
    }
    /**
     * 创建密码
     * @param {新密码} newPassword
     * @returns
     */
    static CreatePassword(newPassword) {
        return new Promise((resolve) => {
            // 使用 chrome.storage存储数据,把key设置为password
            chrome.storage.local.set({
                "password": newPassword
            }, () => {

                // errCode为0是表示
                resolve({ errCode: SUCCESS, errMsg: "" });

            });
        });
    }
    /**
     * 判断密码是否正确
     * @param {密码} inputPassword
     */
    static async UnLock(inputPassword)
    /**
     * 更新密码
     * @param {旧密码} oldPassword
     * @param {新密码} newPassword
     */
    static async UpdatePassword(oldPassword, newPassword)
}
The Promise and async/await syntax of ES6 is used here. Because this is written in background.js and belongs to the background function, the way to store the password here is chrome.storage.local. In order to make the page call these interfaces, you need to export the interfaces The export method is as follows:
Write the following code in background.js:
// 导出PasswordManager
window.digging = {
    PasswordManager
}
In order to directly use the interface in Vue components, it is necessary to register the digging interface into Vue.
Open file main.js, add the following code:
let digging = chrome.extension.getBackgroundPage().window.digging;
installPlugin(digging, 'digging'); // 注册digging到全局
Then open file create-password-page.vue in directory page. Here we should make the following modifications:
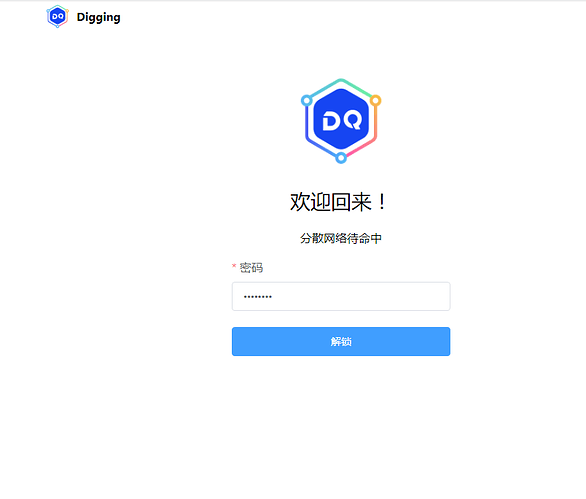
Previously, we only set the page of creating password, but if the current password has been created, the unlocked page needs to be displayed instead of the page of creating password Therefore, we need to add an unlocked page. Some codes are as follows::
<template>
  <div class="unlock-page vertical-only-layout">
    <header-bar />
    <div class="main vertical-layout flex-center">
      <img src="@/assets/logo.png" style="width: 120px; height: 120px" />
      <div class="header">欢迎回来!</div>
      <div class="description">分散网络待命中</div>

      <el-form
        ref="passwordForm"
        :model="passwordInfo"
        style="margin-top: 10px; width: 300px"
      >
        <el-form-item
          prop="password"
          label="密码"
          :rules="[
            {
              required: true,
              message: '请输入密码',
              validator: validator.ValidatePassword,
            },
          ]"
        >
          <el-input
            type="password"
            v-model="passwordInfo.password"
            placeholder="请输入密码"
            :minlength="8"
          />
        </el-form-item>

        <el-form-item class="horzontal-layout vertical-only-layout flex-center ">
          <el-button
            class="first-time-flow-btn"
            type="primary"
            @click="onUnLock"
            >解锁</el-button
          >
        </el-form-item>
      </el-form>
    </div>
  </div>
</template>
The page effect is shown in the figure below:
:
Next, let’s start writing logic code
1, Creating the Logic of Password Page
Use the created function on page create-password-page.vue to judge whether the password already exists. If so, continue to judge whether it has been unlocked. If not, jump to the main interface. If the password is not created, the create face page is displayed, and some codes are as follows:
  created() {
    // 需要判断是否已经创建密码,方式跳转错误
    this.judgeExistPassword();
  },
methods: {
    /**
     * 判断密码是否存在, 如果存在跳转到解锁,页面
     */
   async judgeExistPassword() {
      let IsPwdExist = await this.digging.PasswordManager.IsPasswordExist();
      if (IsPwdExist) {
        // 密码存在说明已经创建密码,然后判断是否已经解锁,未解锁,跳转到界面页面
        let isUnlock = await this.digging.PasswordManager.IsUnlock();
        if (!isUnlock) {
          this.$router.push("/unlock");
        } else {
          // todo 跳转到主界面
        }
      } else {
        this.bShowPage = true;
      }
    },
}
Then we write the code to create the password as follows::
method: {
...省略部分
    onCreate() {
      this.$refs.passwordForm.validate((vaild) => {
        if (!vaild) {
          return;
        }
        // 去掉密码的两边空格
        let newPassword = this.passwordInfo.newPassword.trim();
        let confirmPassword = this.passwordInfo.confirmPassword.trim();
        if (newPassword !== confirmPassword) {
          this.$message.error("两次密码不一致");
          return;
        }
        // 执行创建创建密码的动作
        this.doCreatePassword(newPassword);
      });
    },
    /**
     * 执行创建创建密码的动作
     */
    async doCreatePassword(newPassword) {
      await this.digging.PasswordManager.CreatePassword(newPassword);
      this.$message.success("创建密码成功!");
      //跳转到创建助记词的页面
      this.$router.push("/seed-phrase");
    },
...省略部分
}
2, 1, Creating the Logic of Unlock Password Page
Part of the logic of unlock-page.vue is as follows:
  methods: {
    onUnLock() {
      // 判断密码长度是否符合
      this.$refs.passwordForm.validate((vaild) => {
        if (!vaild) {
          return;
        }
           // 去掉密码的两边空格
        let password = this.passwordInfo.password.trim();
        this.doUnLock(password);
      });
    },
    async doUnLock(password) {
      // 解锁钱包
      let bSuccees = await this.digging.PasswordManager.UnLock(password);
      if (bSuccees) {
        this.$message.success("解锁成功!");
        // todo
        // 1, 解锁成功后,需要判断是否已经有钱包,如果还没钱包,则跳转到创建或者导入钱的页面
        // 2, 如果已经有钱包则跳转到主界面
      } else {
        this.$message.error("密码错误,解锁失败!");
      }
    },
  },
3, The Logic of Generate Mnemonics
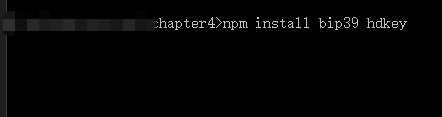
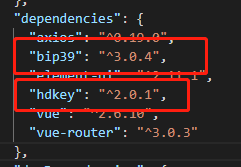
To use mnemonics, you need to install two libraries: bip39 and hdkey. Open the controller in the current project directory and enter npm install bip39 hdkey as shown below:
After installation, you will see the information of the two libraries in the package.json file under the project directory, as shown in the following figure:
Then open seed-phrase-page.vue page, introduce the bip39 library here. The code is as follows:
<script>
... 省略代码
const bip39 = require("bip39");
... 省略代码
</script>
Note that the import method of this library cannot be import, but require.
The code for generating mnemonics is as follows:
... 省略代码
 generateMnemonic() {
     // 生成助记词
    this.curRandomSeed = bip39.generateMnemonic();
 }
... 省略代码
4, Mnemonic Confirmation Page
I, Add seed-phrase-confirm-page.vue file in directory page. Some codes are as follows:
<template>
  <div class="seed-phrase-confirm-page vertical-only-layout">
    <header-bar />
    <div class="go-back" @click="onGoBack">< Back</div>
    <page-title>请确认您的私密备份密语</page-title>
    <div class="text-block">请选择每一个片语,以确保片语正确性。</div>

    <div class="grid-layout select-seed-words">
      <el-button
        class="seed-word"
        v-for="(item, index) in selectWords"
        :key="index"
      >
        {{ item }}
      </el-button>
    </div>
    <div class="grid-layout">
      <el-button
        class="seed-word"
        :type="getBtnType(item)"
        v-for="(item, index) in seedWords"
        :key="index"
        @click="onSelectWord(item)"
      >
        {{ item }}
      </el-button>
    </div>
    <el-button
      type="primary"
      class="confirm-btn"
      :disabled="disableBtn"
      @click="onConfirm"
      >确认</el-button
    >
  </div>
</template>
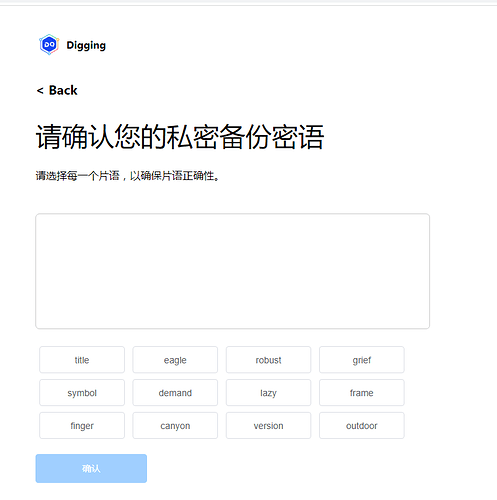
The interface is as follows:
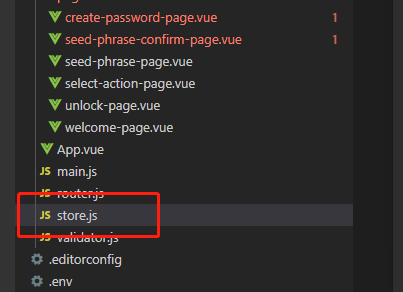
In order to pass the mnemonic generated on seed-phrase-page.vue page to the confirmation page, you need to install the Vuex component. After installing the component, download and create the store in the current project directory store.js file, as shown below:
The code of store.js is as follow:
import Vue from 'vue';
import Vuex from 'vuex';
Vue.use(Vuex);
export default new Vuex.Store({
    state: {
        mnemonic: "", // 保存当前助记词
    },
    getters: {
        GetMnemonic(state) {
            return state.mnemonic;
        },
    },
    mutations: {
        SetMnemonic(state, mnemonic) {
            state.mnemonic = mnemonic;
        },
    }
});
Then, introduce store into main.js file, and the code is as follows:
... 省略代码

import store from './store';

... 省略代码

new Vue({
  router,
  store,
  render: h => h(App),
}).$mount('#app');

... 省略代码
Then we modify the code of seed-phrase-page.vue to save the mnemonic words generated in Vuex:
    generateMnemonic() {
      if (this.mnemonic) {
        return;
      }
      let mnemonic = bip39.generateMnemonic();
      // 把助记词保存在Vuex
      this.$store.commit("SetMnemonic", mnemonic);
    },
    jumpToConfirmPage() {
      this.$store.commit("SetMnemonic", this.mnemonic);
      this.$router.push("/seed-phrase-confirm");
    },
Some codes of mnemonic confirmation page are as follows:
// 引入 bip39 ,hdkey 两个包
const bip39 = require("bip39");
const hdkey = require("hdkey");


... 省略代码
  mounted() {

    if (!this.mnemonic) {
      let mnemonic = bip39.generateMnemonic();
      this.$store.commit("SetMnemonic", mnemonic);
    }
    // 保存正确顺序的助记词
    this.orginSeedWords = this.mnemonic.split(" ");
    // 打算助记词的顺序, 这里 [...this.orginSeedWords] 复制数组
    this.seedWords = this.shuffle([...this.orginSeedWords]);
  },

... 省略代码

    onSelectWord(word) {
      // 判断单词是否被选中, 如果为选中则恢复为未选中
      if (this.seedWordsMap[word]) {
        this.seedWordsMap[word] = false;
        let newSelectWords = [];
        this.selectWords.forEach((ele) => {
          if (ele === word) {
            return;
          }
          newSelectWords.push(ele);
        });
        this.selectWords = newSelectWords;
      } else {
        // 选中单词
        this.seedWordsMap[word] = true;
        this.selectWords.push(word);
      }
      // 计算集配的数量
      let matchWordNum = 0;
      for (let i = 0; i < this.selectWords.length; ++i) {
        let orginWord = this.orginSeedWords[i];
        let selectedWord = this.selectWords[i];

        if (orginWord === selectedWord) {
          ++matchWordNum;
        } else {
          break;
        }
      }
      // 如果全部匹配那么设置确认按钮为可用状态
      this.disableBtn = matchWordNum !== this.orginSeedWords.length;

      this.$forceUpdate();
    },

... 省略代码

    onConfirm() {
      /**
       * 助记词转换为种子
       */
      bip39.mnemonicToSeed(this.mnemonic).then((seed) => {
        const hdSeed = hdkey.fromMasterSeed(seed);

        // 利用hdPath导出子私钥
        const hdPath = "m/44'/60'/0'/0/0"; // platon默认使用路径为0

        const privateKey = hdSeed.derive(hdPath).privateKey.toString("hex");

        console.log(privateKey);
        // 清空store里面的助记词
        this.$store.commit("SetMnemonic", "");
      });
    },

... 省略代码
You need to import bip39 and hdkey libraries on this page. The import method is require.
Well, that’s all for this chapter. In the next chapter, we’ll learn how to import secret keys and how to save mnemonics and secret keys.
The URL of github : https://github.com/DQTechnology/Platon_DevGuideProject
This article is reproduced from https://forum.latticex.foundation/t/topic/5852