Privacy-Preserving Network_Getting Started
Introduction
The Privacy-Preserving Network is a platform to establish the capability for managing the full life cycle of Privacy-Preserving AI, and to suit the requirements of multiple applications, so as to realize the seamless collaboration of technologies (privacy-preserving, blockchain,artificial intelligence, etc) , resources(computing power, data, algorithms, etc) and economic model. It will tackle the problems of data silos, lower the barriers to privacy-preserving AI adoption, and build the next-generation infrastructure of artificial intelligence and digital economy .
Quick Start
Building a privacy-preserving AI project on the Privacy-Preserving Network platform mainly includes the following steps:
- Login
- [Data Preparation](#Data Preparation)
- [Create a Project](#Create a Project)
- [Create a Workflow](#Create a Workflow)
- [Model Training](#Model Training)
- [Model Prediction](#Model Prediction)
- [Create a Job](#Create a Job)
Logging in
The privacy-preserving platform adopts a decentralized way to manage users. You only need a blockchain wallet that supports MetaMask extension to log in , without registering additional accounts. The steps are as follows:
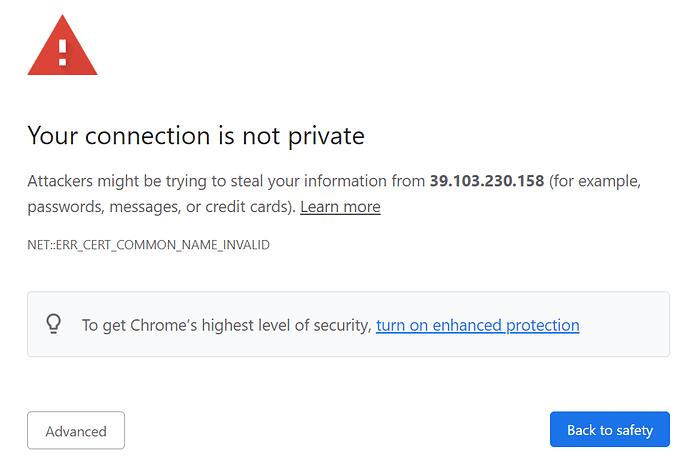
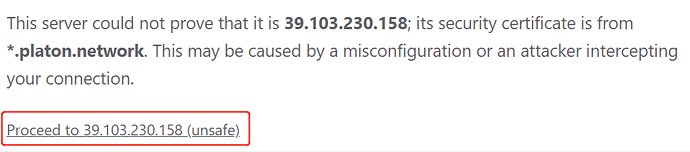
1、Open the public beta address of the privacy-preserving platform in the Chrome browser: https://39.103.230.158:8443/moirae. Firstly, you need to skip the security verification , please click “Advanced”, and then click “Proceed to 39.103.230.158 (unsafe) “;

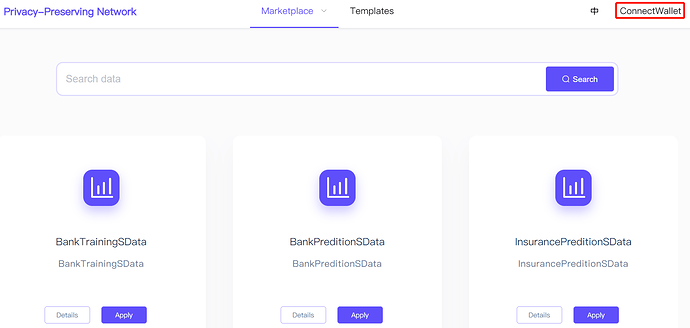
2、After entering the page Data Market , and click “Connect Wallet” in the upper right corner ;
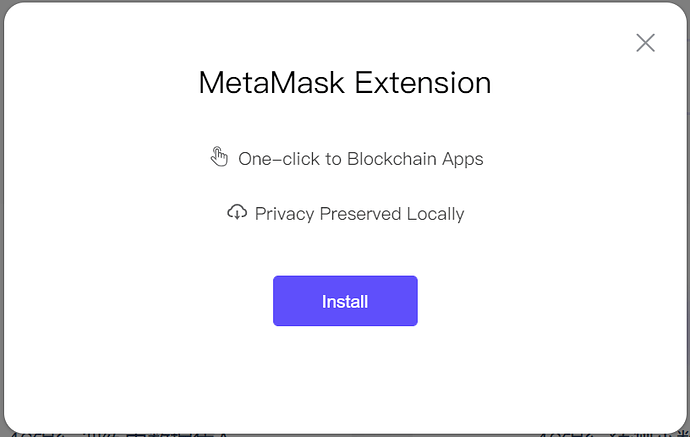
3、As the MetaMask installing window pops up, click the button “Install”, follow the prompts to create or import a wallet. You can skip this step if you have already installed it;
- Note: Metamask extension currently only supports Chrome browser.
4、Click “Connect Wallet” again, after the pop-up window appears, select “I have read and agreed to the “Term of Use” and “Privacy Policy”, then click “MetaMask”;
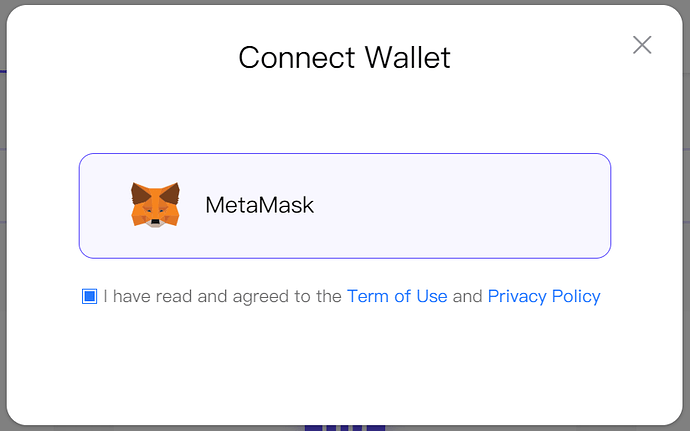
5、When the “Signature” window pops up, click “Signature” to log in.
Data Preparation
At present, all the available data on the platform is for testing. Users only need to apply for the authorities of the data, which can be used after the data owners accept. Steps as follows:
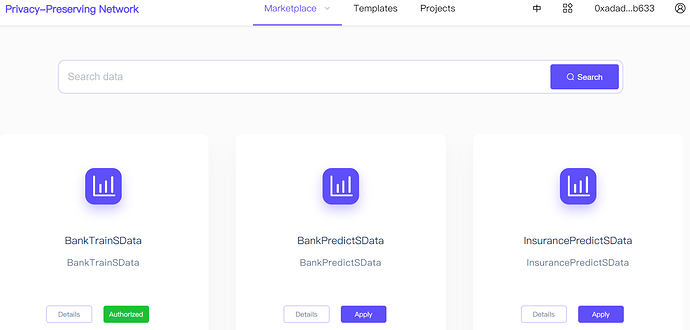
1、After Logging in, enter the Data Market page, select any data and click “Apply” , then click the “Signature” button after the “Signature” window pops up ;
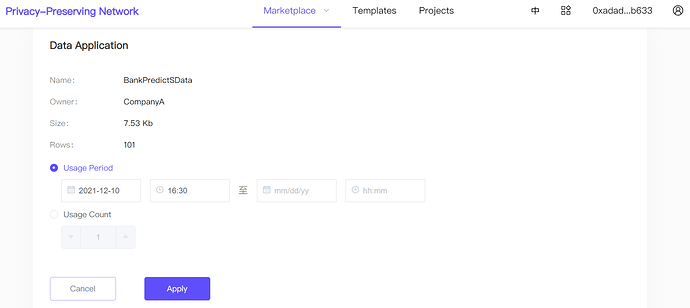
2、Enter the “Data Application” page, choose the authorization method “Usage Period” or “Usage Count”, select the correspongding value, and then click “Apply”;
3、Open the page”My Resources-Data”, you can view the list and authorization status of the data you have applied;
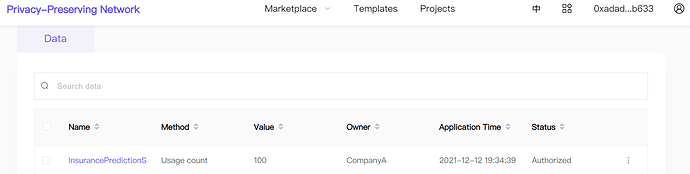
4、When the status changes to “Authorized”, it means the data authorization has succeeded, and the status on the Data Market page will also change to “Authorized”. Now you can use it for [Model Training](#Model Training)。
- Note: In Privacy-Preserving Computation tasks, it is generally necessary to apply at least two collaborators’ data, one as the “data initiator” (or “data queryer”) and the other as the “data responder” (or “data server”).
Create a Project
“Project” is a module for users to manage Privacy-Preserving Computation tasks. The platform users can create projects based on the Templates page, or independently create a project on the [Projects](https://39.103.230.158:8443/moirae/ project/all) page. The following are steps:
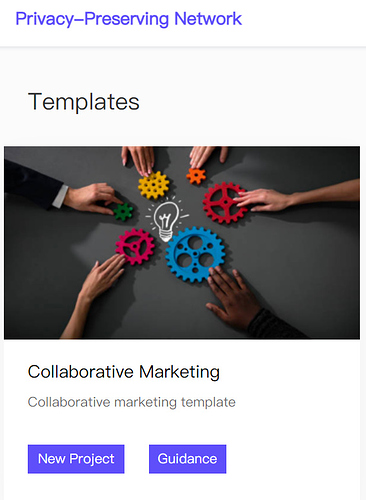
Create on the “Templates” page
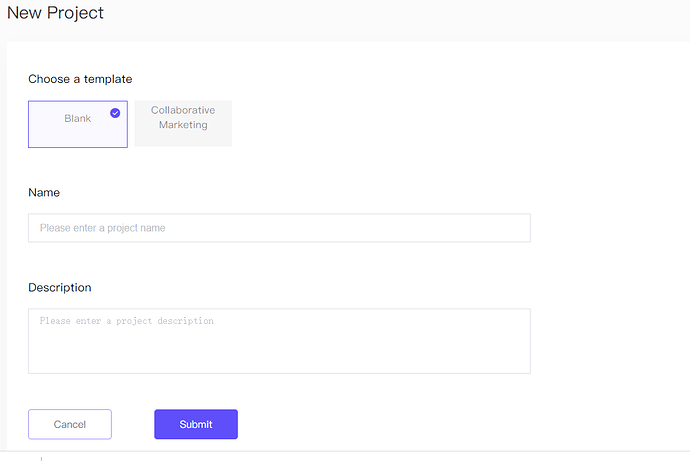
1、After entering the Templates page, select one template and click “New Project”;
2、After the “New Project” page is loaded, the corresponding template has been selected by default, enter a project name and a description (not required), and click the “Submit” button to create a new project;
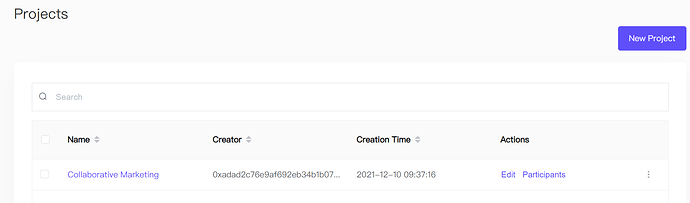
3、On the page” Projects “, click one project name to view its details, the “workflows” page will be loaded defaultly;
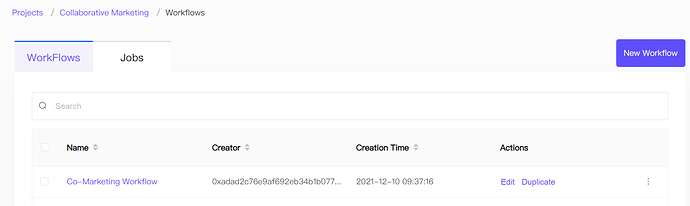
4、After the page “Workflows” is displayed, you will see one template has already existed。
Create on the “Projects” page
1、Enter the page ” Projects “and click the button “New Project”;
2、Select one template (blank template will create a project without any entities), enter a project name and a description (not required), and click the “Submit” button to create a new project;
3、On the page” Projects “, click one project name to view its details, the “workflows” page will be loaded defaultly;
4、After the page “Workflows” is displayed, you can click “New Workflow” to start construct your project.
Create a Workflow
“Workflow” is the main workspace for constructing and debugging your privacy-preserving computation tasks. Steps as follows:
1、Open the “Workflows” page and click the “New Workflow” button;
2、Enter a “workflow name” and a “workflow description” (not required) , and then click “Submit”.
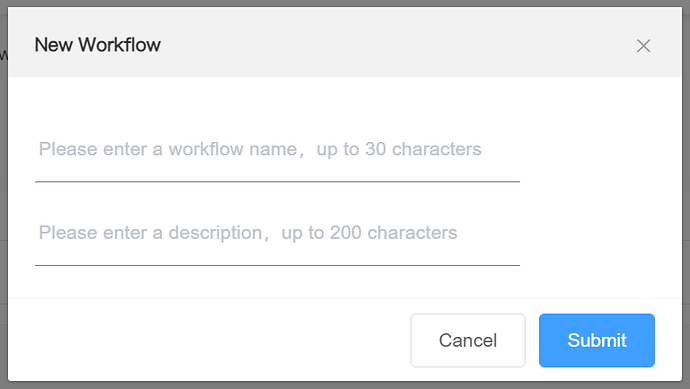
- Note: You can also edit the workflow based on the templates directly.
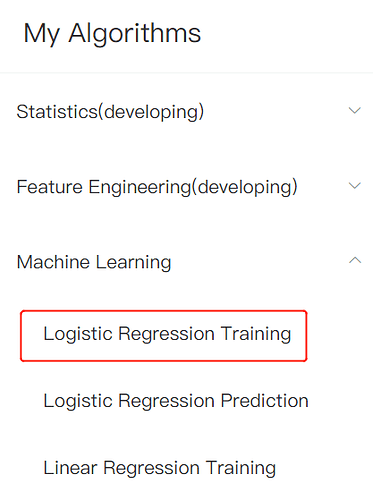
Model Training
You can train privacy-preserving models without any codes in the workflows. The steps are as follows:
1、Click the workflow name selected on the page “Workflows” to view the details;
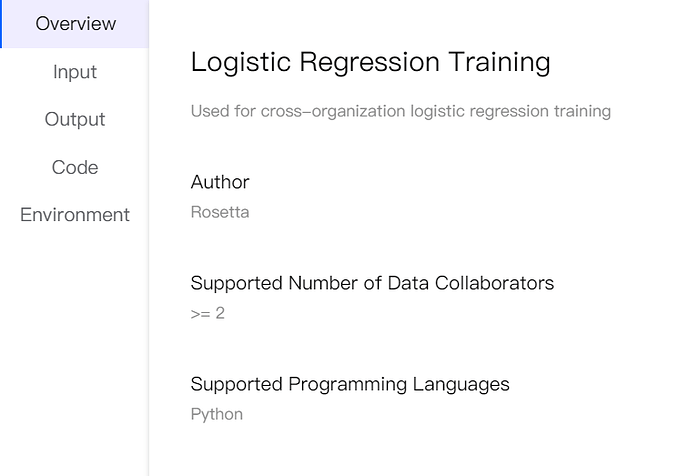
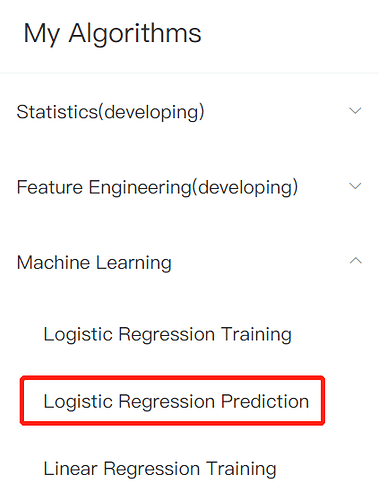
2、After the page opens, click “Machine Learning” in “My Algorithms” module on the left, expand the list, and click the “Logistic Regression Training” button;
3、The “Logistic Regression Training” node will appear in the center of the page, click it to open its configuration window on the right side;
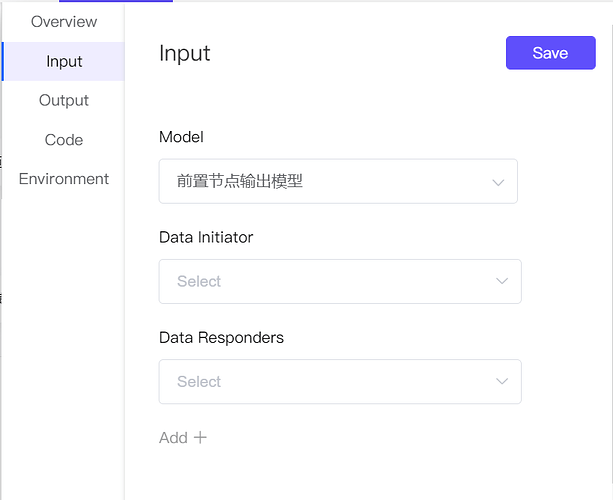
4、In the node configuration window, click “Input” option, select the “Data Initiator” and “Data responders”, configure the corresponding ID column, labels, features, etc.
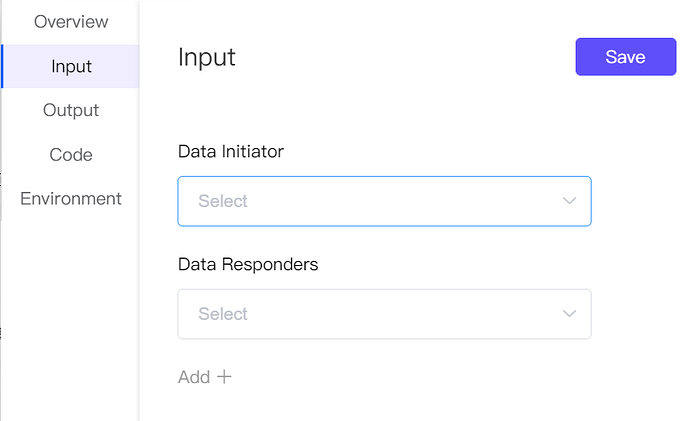
- Note: In privacy logistic regression (vertical) model, the features of the data initiator and the data responders are generally different.
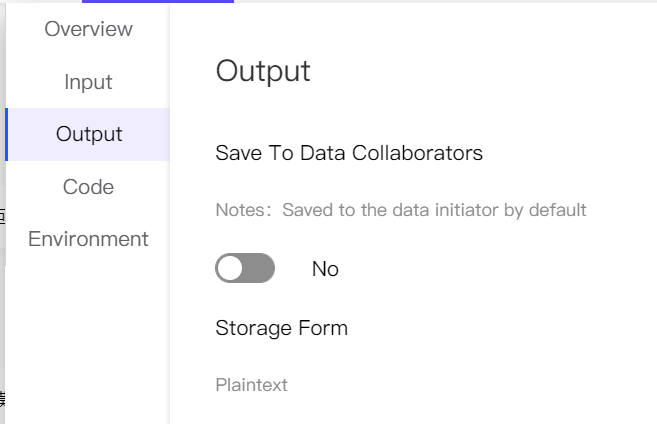
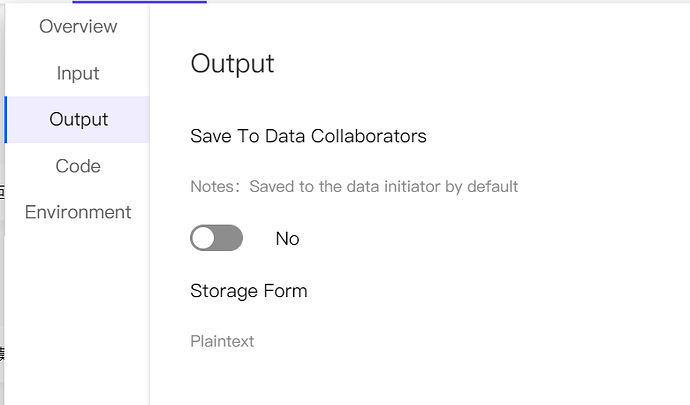
5、Click the “Output” option and choose whether to save to “Data Responders”;
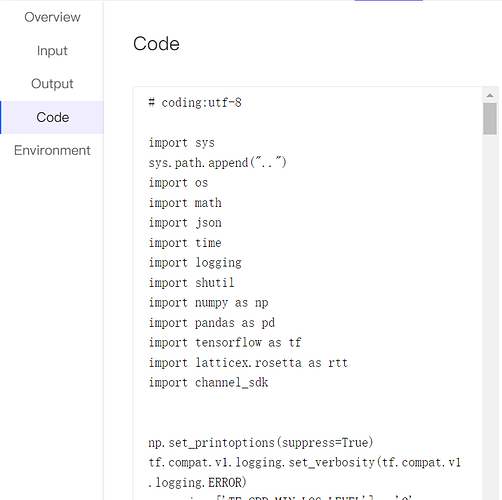
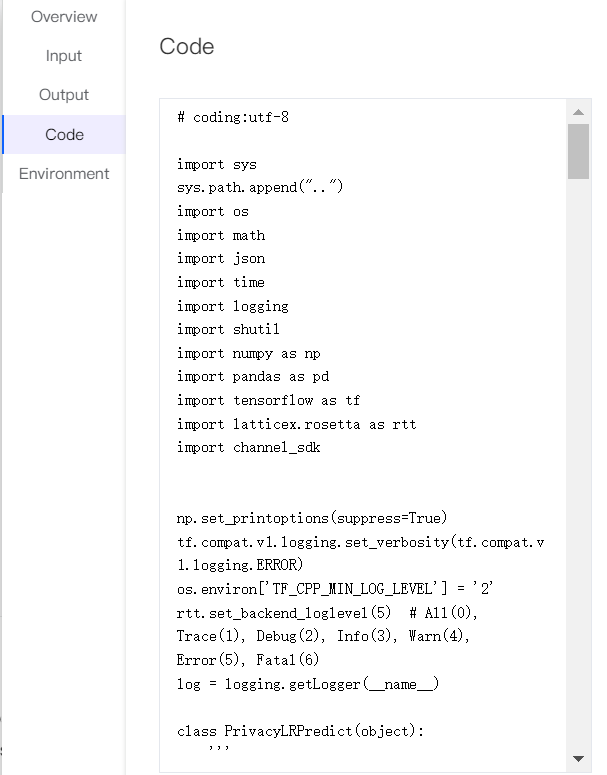
6、Click the “Code” option to view the algorithm codes executed by the current node;
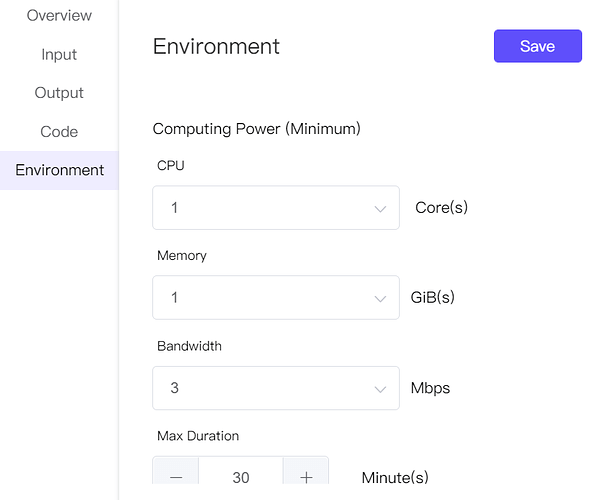
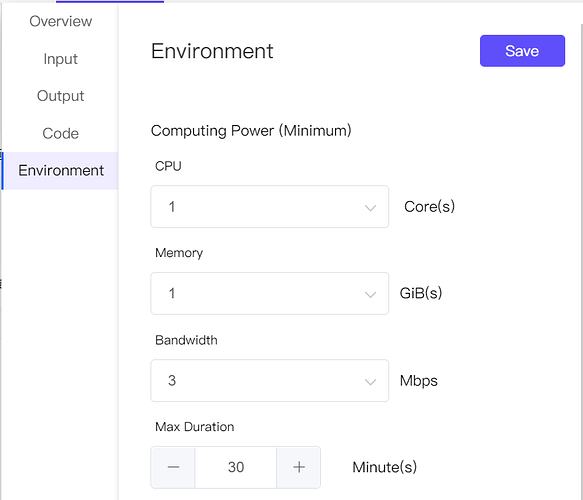
7、Click the “Environment” option, select the minimum requirements for computing resources, including CPU, memory, bandwidth, etc., and then select the “Max Duration”;
- Note: The system will automatically allocate the best resources to run the task
8、After completing the configuration, click “Start” in the upper right corner of the page, and click “Signature”, then the workflow will start up;

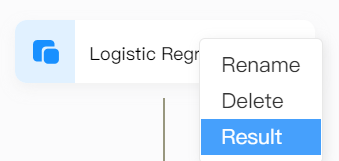
9、After the workflow is completed, you can right-click the node “Logistic Regression Training” and click “Result” to view the training result;
10、In the pop-up window, you can view the result storage information.
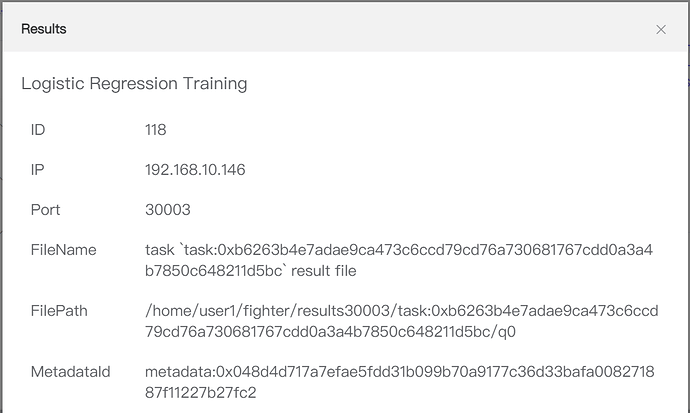
- Note: The result storage authorization is configured in the node [Output] option. If you are not the data collaborator, there will be no permission to view the result for you.
Model Prediction
You can use the trained privacy-preserving models to predict without any codes in the workflows. The steps are as follows:
1、After completing the [Model Training](#Model Training) step, click the “Logistic Regression Prediction” algorithm;
2、The “Logistic Regression Prediction” node will appear in the center of the page, click it to open its configuration window on the right side;

3、In the node configuration window, click “Input” option, select the “Model” (default is the pre-node output model), “Data Initiator” and “Data Responders”, and configure the corresponding ID column, labels(not required), features, etc;
4、Click the “Output” option and choose whether to save to “Data Responders”;
5、Click the “Code” option to view the algorithm codes executed by the current node;
6、Click the “Environment” option, select the minimum requirements for computing resources, including CPU, memory, bandwidth, etc., and then select the “Max Duration”;;
7、After completing the configuration, click “Start” in the upper right corner of the page, and click “Signature”, then the workflow will start up;
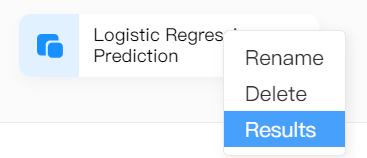
8、After the workflow is completed, you can right-click the node “Logistic Regression Prediction” and click “Result” to view the prediction result;
9、In the pop-up window, you can view the result storage information。
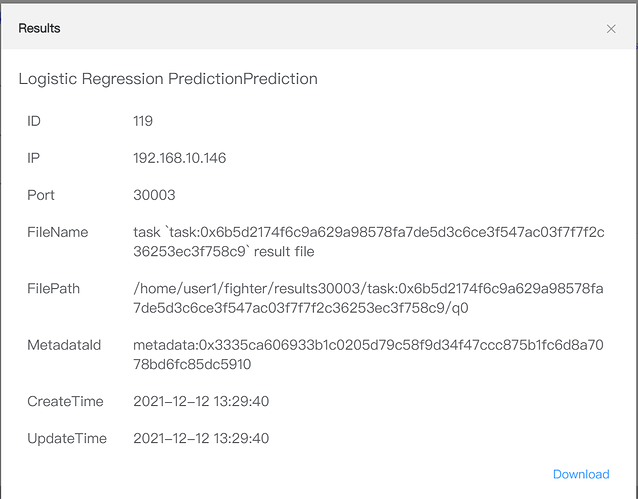
- Note: The result storage authorization is configured in the node [Output] option. If you are not the data collaborator, there will be no permission to view the result for you。
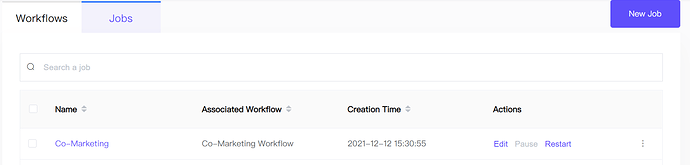
Create a Job
Jobs are used to execute and monitor schedule tasks. Steps as follows:
1、On the page ” Projects “, click any project name to enter its details pages (the “Workflow” page will be opened by default);
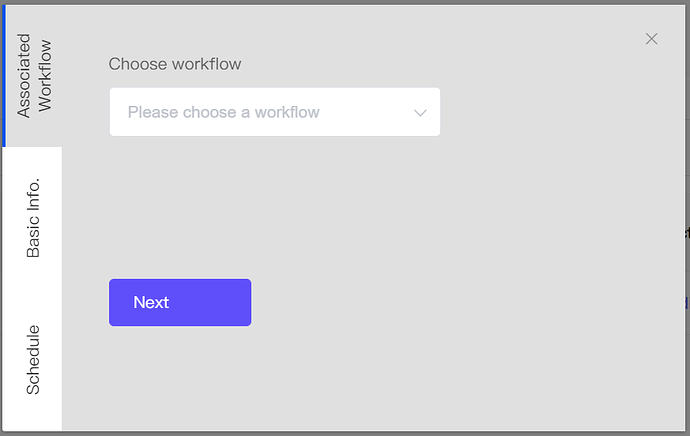
2、Select “Jobs” option and Click “New Job”;
3、In the pop-up window,click “Associated Workflow”,and select a workflow for the schedule task;
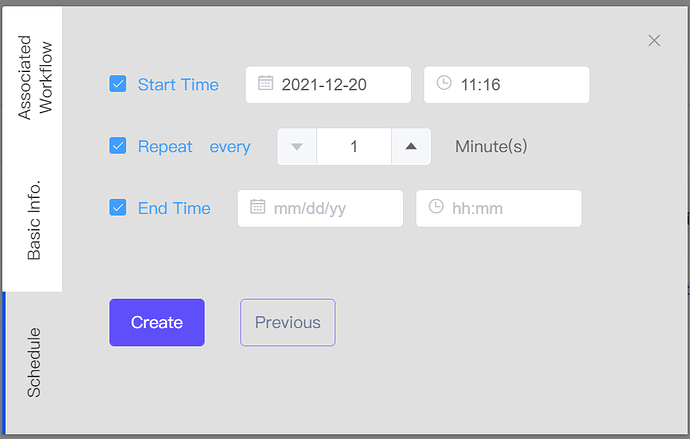
5、Select the “Basic Info.” configuration option, enter a “Name” and a “Description” (optional);

6、Select “Schedule” option, choose “Start Time”, “Repeat” Frequency, “End Time”, then click the “Create”button to start the job;
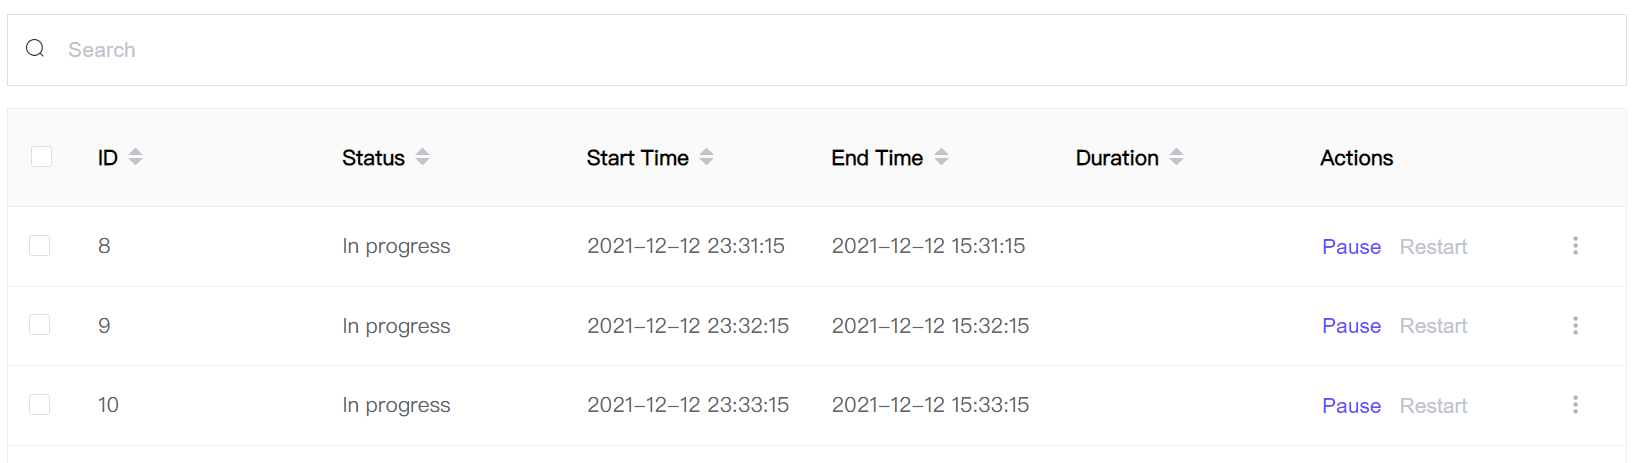
7、On the page ” Jobs “, select one job name, you can view the running status of its sub-jobs。
This article is reproduced from https://forum.latticex.foundation/t/topic/5924