Author Dex_DQT
In this chapter, we will learn how to receive the Commission reward, redeem the Commission and realize the function of multiple network nodes.
Write a page that displays a list of wallet delegates
Create my-delegate-table.vue in the component directory, as shown in the follows:

Some code is as follow:
<template>
    <div class="my-delegate-table">
        <div class="horzontal-layout header-bar flex-horzontal-center ">
            <span class="flex-1"></span>
            <span>总委托</span>
            <span style="margin:0 16px;">{{ totalDelegate }}LAT</span>
            <span>可领取</span>
            <span style="margin:0 16px;">{{ totalReward }}LAT</span>
            <el-button type="primary" size="mini" round style="margin:0 16px 0 0;">领取</el-button>
        </div>
        <el-table :data="datas" style="width: 100%" height="400">
            <el-table-column prop="nodeName" label="节点名" width="120"> </el-table-column>

            <el-table-column prop="nodeId" label="节点ID" width="500">
                <template slot-scope="scope">
                    <span class="ellipsis">{{ scope.row.nodeId }}</span>
                </template>
            </el-table-column>

            <el-table-column prop="deletegateLAT" label="委托LAT"> </el-table-column>

            <el-table-column prop="reward" label="待领取奖励" />

            <el-table-column label="操作" header-align="center" align="center" fixed="right">
                <template slot-scope="scope">
                    <el-button size="mini" type="text" @click="onUnDelegate(scope.row)"
                        >赎回委托</el-button
                    >
                </template>
            </el-table-column>
        </el-table>
    </div>
</template>
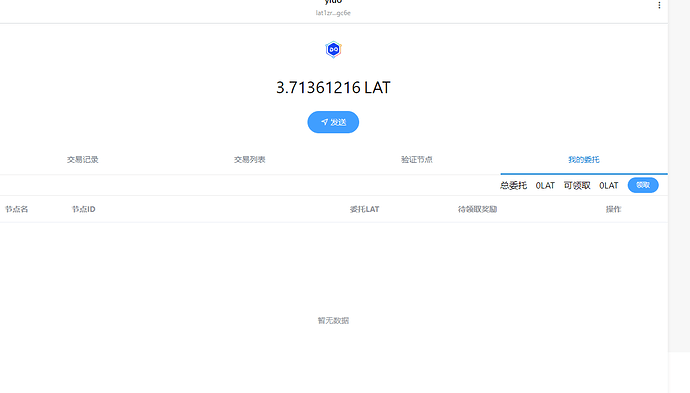
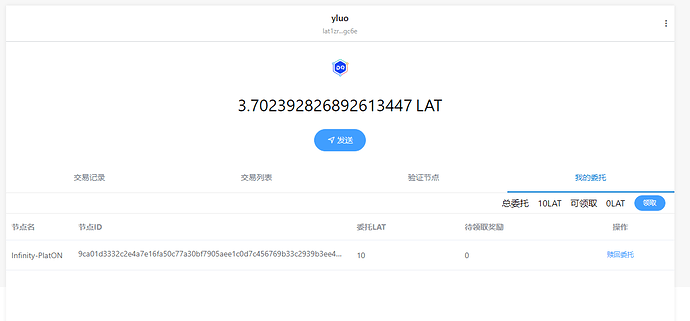
Then uses this component in main-page.vue, and the effect is shown in the figure below:
Write the logic to get the delegate list
add the following code in the Delegated management of background.js:
    /**
     * 获取所有节点委托信息
     * @returns
     */
    static async GetDelegateInfoList() ;
        /**
     * 获取单个节点的委托情况
     * @param {*} ppos
     * @param {*} hexStrBufAddr
     * @param {*} nodeStrBufId
     * @param {*} delegateNode
     * @returns
     */
    static async getSingleDelegateInfo(ppos, hexStrBufAddr, nodeStrBufId, delegateNode) ;
    /**
     * 获取节点信息
     * @param {} ppos
     * @param {*} nodeId
     */
    static async getNodeInfo(ppos, nodeStrBufId) ;
    /**
     * 获取所有节点未领取的奖励
     * @param {*} ppos
     * @param {*} hexStrBufAddr
     * @param {*} delegateNodeList
     */
    static async getRewardMap(ppos, hexStrBufAddr);
    /**
     * 查询当前账户地址所委托的节点的NodeID和质押Id
     * @param {*} address
     */
    static async getRelatedListByDelAddr(ppos, hexStrBufAddr);
Because the node does not provide an interface to directly obtain all delegate information, we need to call several interfaces to obtain it The process is as follows:
- First, call the 1103 interface to obtain the expected block height information of all delegated nodes of the wallet address. The information returned by the interface is as follows:
Addr: The account address of client
NodeId: The ID of the delegate node
StakingBlockNum: The block height when pledge is initiated - Then call the 5100 interface to obtain the delegation reward of all node IDs on the current address. The interface returns the information as follows:
reward: Unclaimed entrusted income
nodeID: The ID of the delegate node
stakingNum: Block height when pledge is initiated
It should be noted that the characters returned by reward are hexadecimal which need to call web3.utils.hexToNumberString to convert them into hexadecimal strings. - Then, the node name is obtained through the 1105 interface. The interface returns many fields, but we only use the NodeName field
- Finally, the 1104 interface is called to get the number of LAT delegated on the node. The number of delegate includes the Free LAT Released field and the Lock LAT RestrictingPlan field. You need to add these two values to get the total number of pledged LAT.
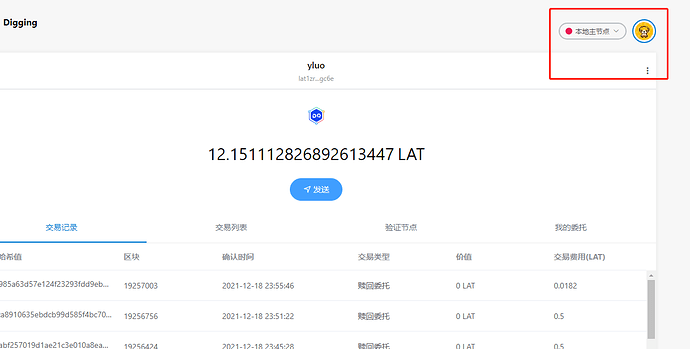
Finally, we can see the rewards obtained by the 10lat entrusted in the previous chapter, as shown in the following figure:
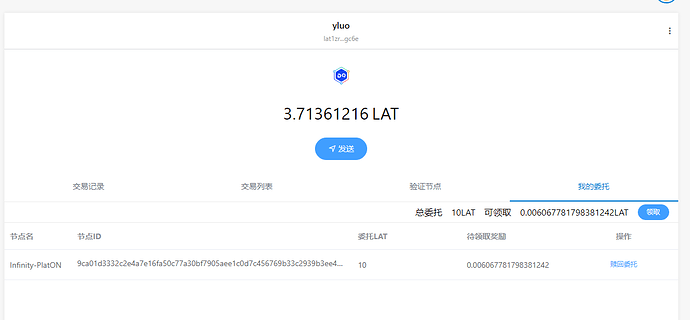
The rewards on the browser are as follows:

It can be seen that the reward data obtained through the logic code we write is consistent with the data given by the blockchain browser.
Write the Page to Receive the Entrusted Reward
Create a new file withdraw-delegate-reward-page.vue in the page directory. Some codes are as follows:
<template>
    <div class="withdraw-delegate-reward-page vertical-only-layout">
        <header-bar />
        <div class="go-back" @click="onGoBack">< Back</div>
        <page-title>领取委托奖励</page-title>
        <el-form ref="sendForm" :model="withdrawInfo">
            <el-form-item label="领取奖励">
                <el-input class="send-input" disabled v-model="withdrawInfo.withdrawNum" />
            </el-form-item>

            <el-form-item label="所需手续费">
                <el-input disabled class="send-input" v-model="withdrawInfo.gasfee" />
            </el-form-item>

            <el-form-item>
                <div class="horzontal-layout">
                    <span class="flex-1"></span>
                    <el-button class="create-btn" @click="onGoBack">取消</el-button>

                    <el-button class="create-btn" type="primary" @click="onWithdraw"
                        >领取</el-button
                    >
                </div>
            </el-form-item>
        </el-form>
    </div>
</template>
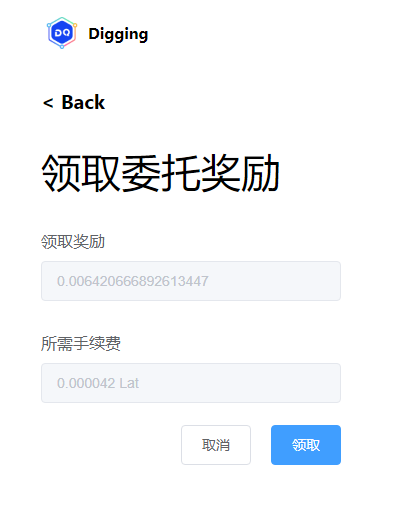
Effect:
Write the logic of receiving the entrusted reward
Add the code for receiving rewards to the DelegateManager in the background.js:
    static async WithdrawDelegateReward() {
        let web3 = NetworkManager.GetWebIns();
        let curAccount = await PrivateKeyManager.GetCurrentAccount();
        let privateketRes = await PrivateKeyManager.ExportPrivateKey(
            curAccount,
            PasswordManager.GetPassPassword()
        );
        if (privateketRes.errCode !== 0) {
            return privateketRes;
        }
        let walletInfo = privateketRes.data;

        let ppos = new web3.PPOS({ provider: NetworkManager.GetCurNetworkRPCUrl() });

        ppos.updateSetting({
            privateKey: walletInfo.privateKey,
            chainId: NetworkManager.GetChainId()
        });

        let params = {
            funcType: 5000 // 领取委托的函数
        };

        let reply = await ppos.send(params);
        return {
            errCode: SUCCESS
        };
    }
After receiving the reward , it would be like:
You can see that the reward has been received.
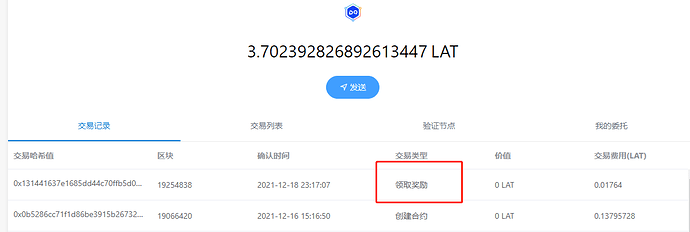
Switch to our transaction record page and you can see the record of receiving rewards:
Write the Redemption Entrustment Page
Create the file undelegate-lat-page.vue in page directory. Some code shown as follows:
<template>
    <div class="delegate-lat-page vertical-only-layout">
        <header-bar />
        <div class="go-back" @click="onGoBack">< Back</div>
        <page-title>赎回委托</page-title>
        <el-form ref="delegateForm" :model="unDelegateInfo">
            <el-form-item prop="nodeName" label="节点名">
                <el-input disabled class="send-input" v-model="unDelegateInfo.nodeName" />
            </el-form-item>

            <el-form-item prop="nodeId" label="节点id">
                <el-input disabled class="send-input" v-model="unDelegateInfo.nodeId" />
            </el-form-item>

            <el-form-item prop="lat" label="委托数量">
                <el-input class="send-input" disabled v-model="unDelegateInfo.deletegateLAT" />
            </el-form-item>

            <el-form-item
                prop="lat"
                label="赎回数量"
                :rules="[
                    {
                        required: true,
                        message: '请输入要委托的LAT数量(不少于10LAT)',
                        validator: ValidateLAT
                    }
                ]"
            >
                <el-input
                    class="send-input"
                    type="number"
                    v-model="unDelegateInfo.withdrawLat"
                    placeholder="请输入要赎回的LAT数量"
                />
            </el-form-item>

            <el-form-item label="所需手续费">
                <el-input disabled class="send-input" v-model="unDelegateInfo.gasfee" />
            </el-form-item>

            <el-form-item>
                <div class="horzontal-layout">
                    <span class="flex-1"></span>
                    <el-button class="create-btn" @click="onGoBack">取消</el-button>
                    <el-button class="create-btn" type="primary" @click="onUnDelegate"
                        >赎回</el-button
                    >
                </div>
            </el-form-item>
        </el-form>
    </div>
</template>
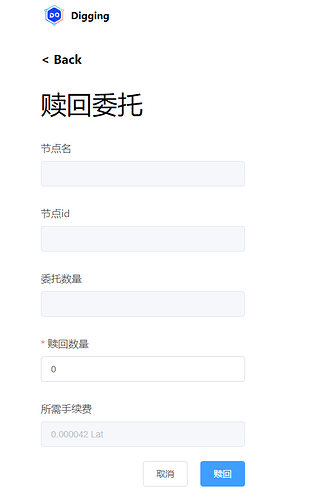
Note: the minimum number of redeem LAT is 10:
The interface effect is as follows:
Write the Logic of Redemption
Add the following code in the DelegateManager of background.js:
    /**
     * 赎回委托
     * @param {}} stakingBlockNum
     * @param {*} nodeId
     * @param {*} lat
     * @returns
     */
    static async UnDeletgate(stakingBlockNum, nodeId, lat) {
        debugger
        let web3 = NetworkManager.GetWebIns();
        let curAccount = await PrivateKeyManager.GetCurrentAccount();
        let privateketRes = await PrivateKeyManager.ExportPrivateKey(
            curAccount,
            PasswordManager.GetPassPassword()
        );
        if (privateketRes.errCode !== 0) {
            return privateketRes;
        }
        let walletInfo = privateketRes.data;

        let ppos = new web3.PPOS({ provider: NetworkManager.GetCurNetworkRPCUrl() });
        ppos.updateSetting({
            privateKey: walletInfo.privateKey,
            chainId: NetworkManager.GetChainId()
        });
        debugger
        stakingBlockNum = parseInt(stakingBlockNum);

        let params = {
            funcType: 1005, // 委托LAT的函数
            stakingBlockNum: stakingBlockNum,
            nodeId: ppos.hexStrBuf(nodeId),
            amount: ppos.bigNumBuf(web3.utils.toVon(lat, "lat"))
        };

        let reply = await ppos.send(params);
        return reply;
    }
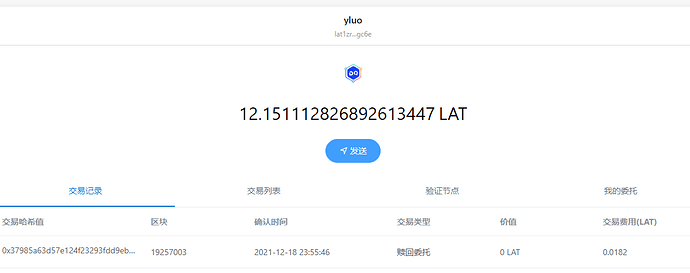
The redemption results are shown in the figure below:
The above is the function of LAT to receive commission rewards and redeem commissions. Then we add multiple networks.
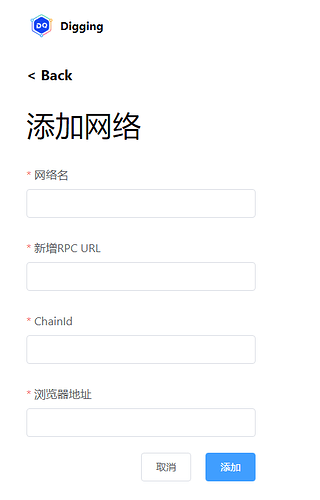
Write a Page to Add Network Nodes
Creat add-networks-page.vue in page director, some code shown below:
<template>
    <div class="add-networks-page vertical-only-layout">
        <header-bar />
        <div class="go-back" @click="onGoBack">< Back</div>
        <page-title>添加网络</page-title>
        <el-form ref="networkForm" :model="networkInfo">
            <el-form-item prop="name" label="网络名">
                <el-input

                    class="send-input"
                    v-model="networkInfo.name"
                    :rules="[
                        {
                            required: true,
                            message: '请输入网络名'
                        }
                    ]"
                />
            </el-form-item>

            <el-form-item prop="rpcUrl" label="新增RPC URL">
                <el-input

                    class="send-input"
                    v-model="networkInfo.rpcUrl"
                    :rules="[
                        {
                            required: true,
                            message: '请输入RPC URL'
                        }
                    ]"
                />
            </el-form-item>
            <el-form-item prop="chainId" label="ChainId">
                <el-input

                    class="send-input"
                    v-model="networkInfo.chainId"
                    :rules="[
                        {
                            required: true,
                            message: '请输入chainId'
                        }
                    ]"
                />
            </el-form-item>

            <el-form-item prop="browserUrl" label="浏览器地址">
                <el-input

                    class="send-input"
                    v-model="networkInfo.browserUrl"
                    :rules="[
                        {
                            required: true,
                            message: '浏览器地址'
                        }
                    ]"
                />
            </el-form-item>

            <el-form-item>
                <div class="horzontal-layout">
                    <span class="flex-1"></span>
                    <el-button class="create-btn" @click="onGoBack">取消</el-button>
                    <el-button class="create-btn" type="primary" @click="onAdd">添加</el-button>
                </div>
            </el-form-item>
        </el-form>
    </div>
</template>
It would be like:
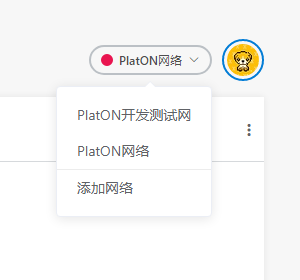
Then we add the jump function in the main-page.vue. The code is as follows:
...省略代码
<el-dropdown trigger="click">
       <div class="network-component  horzontal-layout flex-center">
           <span style="background:#e91550" class="circle-dot"></span>
           <span class="network-name">{{ curNetworkName }}</span>
           <i class="el-icon-arrow-down"></i>
       </div>
       <el-dropdown-menu slot="dropdown">
           <el-dropdown-item
               @click.native="onSwitchNetwork(item)"
               v-for="(item, index) in networkList"
               :key="index"
               >{{ item }}</el-dropdown-item
           >
           <div class="line"></div>
           <el-dropdown-item @click.native="onAddNetwork">添加网络</el-dropdown-item>
       </el-dropdown-menu>
</el-dropdown>
...省略代码
Effect:
Write a Logic for Adding Network Node
Add the following configuration in the manifest.json, otherwise cross domain restriction will occur. As for the specific functions, the next chapter will explain to you with Api exporting:
  "content_scripts": [
    {
      "matches": [
        "file://*/*",
        "http://*/*",
        "https://*/*"
      ],
      "js": [
        "js/contentscript.js"
      ],
      "run_at": "document_start",
      "all_frames": true
    }
  ],
Add the following code to the NetworkManager class of background.js:
    /**
     * 添加网络
     * @param {*} netWorkInfo
     * @returns
     */
    static AddNetwork(netWorkInfo) {
        return new Promise(resolve => {
            // 判断网络是否已经存在
            if (NetworkManager.networkInfos[netWorkInfo.name]) {
                resolve({
                    errCode: ERROR,
                    errMsg: "网络已经存在!"
                });
                return;
            }

            NetworkManager.networkInfos[netWorkInfo.name] = {
                rpcUrl: netWorkInfo.rpcUrl,
                chainId: netWorkInfo.chainId,
                browserUrl: netWorkInfo.browserUrl
            };

            chrome.storage.local.set(
                {
                    networkInfos: NetworkManager.networkInfos
                },
                () => {
                    resolve({ errCode: SUCCESS });
                }
            );
        });
    }
I deployed the nodes of the test network and the main network locally, as shown in the figure below:

Process 30004 is the test network node and 31303 is the main network node
Add test network node:
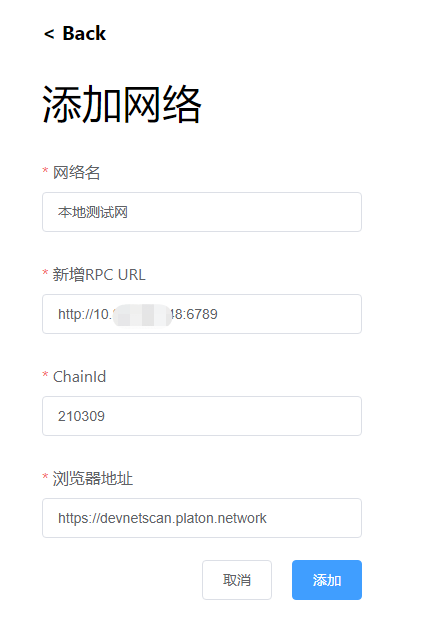
Here, I have not built my own blockchain browser, but still uses the one provided on the official website.
The effect is as follows:
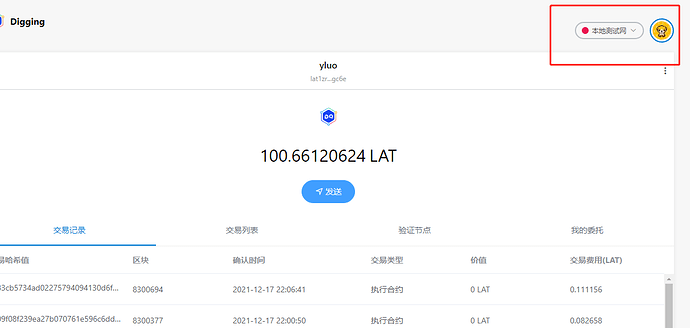
Add a master node and the effect is as follows:
Well, that’s the end of this chapter. Now, all the core functions of Digging in the browser version have been completed. In the next chapter, we explain how to export the Digging interface to web pages.
The URL of github : https://github.com/DQTechnology/Platon_DevGuideProject
This article is reproduced from https://forum.latticex.foundation/t/topic/5915