Link to Astro: http://astro.cryptocamp.network
Tip: Update Google Chrome to the latest version
Astro Usage Guidelines
Download the Plug-in
Click the Download Plugin button on the home page. Shown as below:


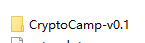
The downloaded plug-in is shown below (note: v0.1 is the latest version number of the plug-in):

Unzip it as follows:
Installing Plug-in
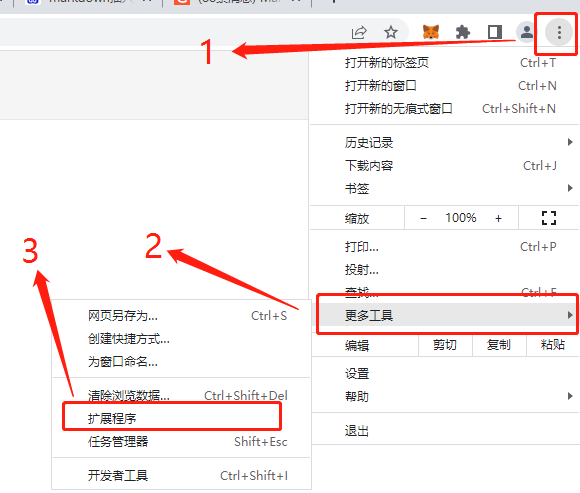
- Click on the menu button in the top right corner of your browser.
- Click on “More Tools” on the menu page that pops up.
- Click on “Extensions” on the menu page that pops up to jump to the Extensions page.
- Drag the unpacked plug-in folder onto this page with your mouse then installation is complete.
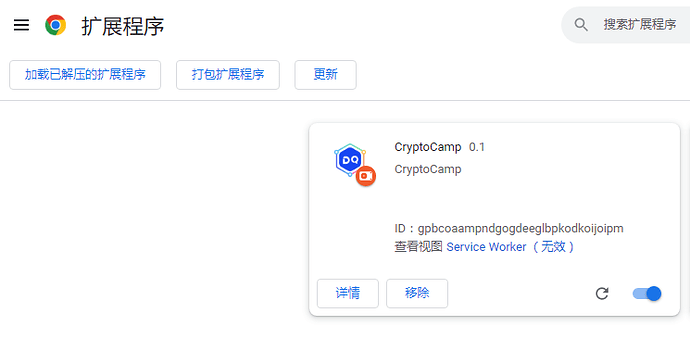
The page for the successful plug-in installed is shown below:
Once the plugin has been installed, refresh the page and the Download Plugin button on the interface will change to a Set Password button:

Set Password
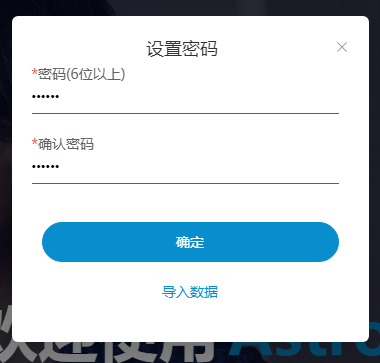
Click on the Set Password button on the home page and the Set Password dialog box will pop up, as shown below:
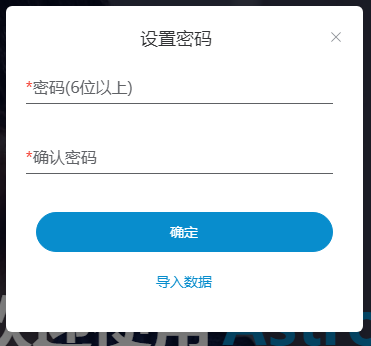
Once you have entered your password, click 确定, as follows:
Importing the Key
After setting the password, the Import Key button will appear on the home page, as follows:

Click on this button to bring up the dialog box for setting the key, as shown below:
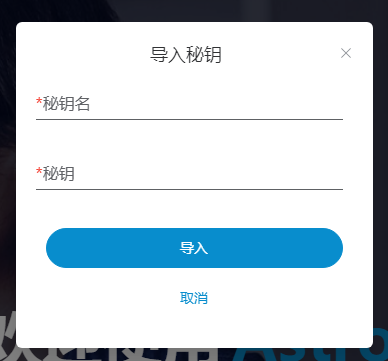
Enter the key name and the key and click the Import button:
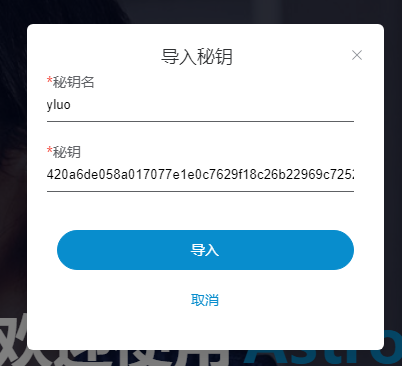
Note: All Astro data is stored in the browser plugin and no data is stored in the backend.
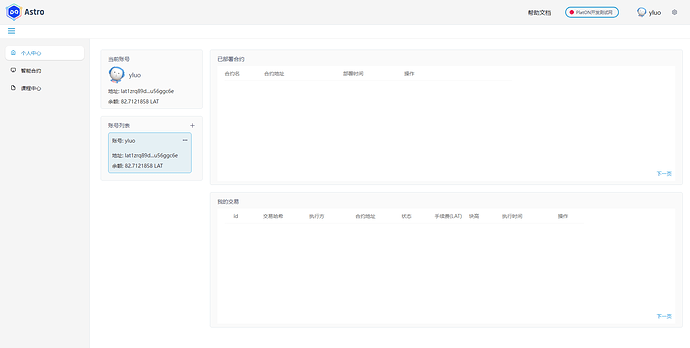
Once imported, click the Enter button to access the main page, as follows:
Main Page Introduction
- The head of home page: displays help jump button, network switch button, current account information, and settings button
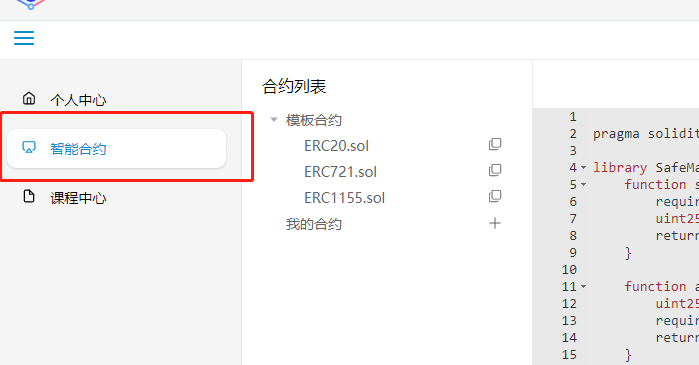
- On the left of the page is the main menu, which currently contains the Personal Centre, Smart Contracts and the Help Centre
- Personal Centre contains current account, account list, deployed contracts and my trading information
- Current account: This account will be used for all transactions currently being executed
- Account List: Shows all accounts currently imported. A dialog box would be popped up to add an account when click the + button
- Deployed contracts: showing contracts deployed at Astro
- My Transactions: Only transactions initiated at Astro will be displayed
- Smart Contracts: Clicking on this option will take you to the editor. The list of contracts has two options, Template Contracts and My Contracts, as shown below:
- Course Centre: Astro will post courses related to blockchain development here
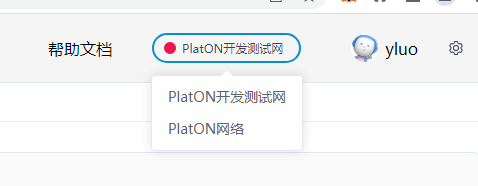
Network switch
The chains currently supported by Astro are the PlatON main network and the PlatON test network, but custom networks are not yet supported.
Click on the network switch button in the top right corner, the network list will be displayed as shown below, you can choose the corresponding network according to your needs。
Creating & Deploying Smart Contracts
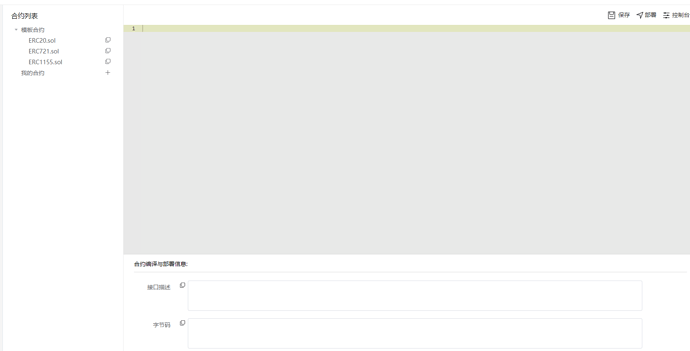
Click on the Smart Contracts option in the main menu to enter the Smart Contract Editor, as shown below:
Astro comes with three template contracts, ERC20, ERC721 and ERC1155, so we can deploy them directly without any modifications.
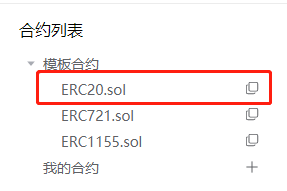
The following is an example of the deployment of ERC20 contracts:
- 1, click on the Copy button to the right of ERC20 in the template contract, as shown below:
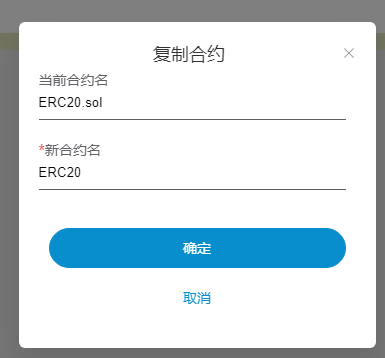
- 2, Enter the contract name in the Copy Contract dialog box that pops up. Note: The contract name must match the contract file when compiling, so the contract name must be ERC20, as follows:
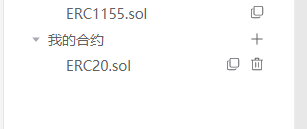
Once copied, the contract could be seen in My Contracts, as follows.
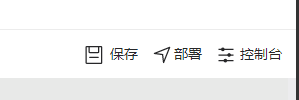
- Click on the ERC20 contract under My Contracts and the following button will appear in the menu bar in the top right hand corner.
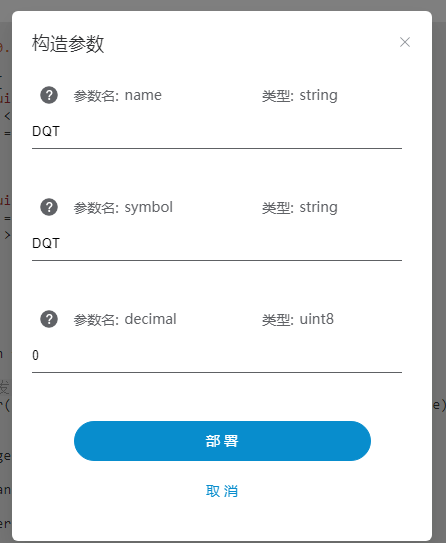
- 4, click the Deploy button, if the smart contract construction parameters have parameters that need to be entered, it will pop up the construction parameters input dialog box, if not, it will be deployed directly. The dialog box for constructing parameters is shown below:
- 5, Click on the deploy button, a “deploying” message will pop up. After the deployment is complete, the information box at the bottom will show the abi, bytecode, deployment hash and contract address of the smart contract. As shown below:
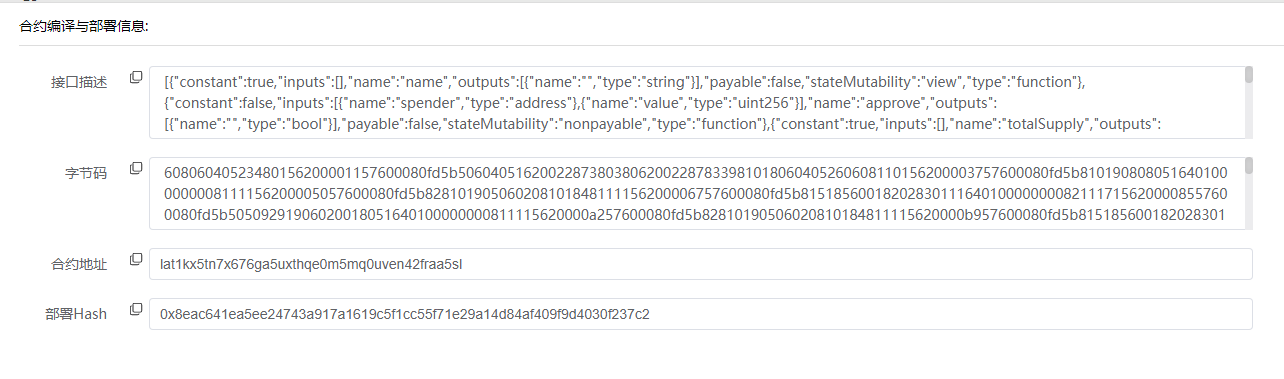
部署信息如下:


    合约地址:lat1kx5tn7x676ga5uxthqe0m5mq0uven42fraa5sl

    部署哈希:0x8eac641ea5ee24743a917a1619c5f1cc55f71e29a14d84af409f9d4030f237c2


这次部署是在测试网部署的,可以在[测试网的浏览器](https://devnetscan.platon.network/contract-detail?address=lat1kx5tn7x676ga5uxthqe0m5mq0uven42fraa5sl)看到该合约的信息,如下图:
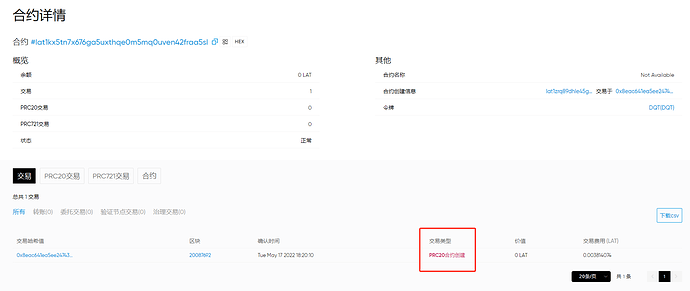
可以看到我们已经完成了ERC20合约的部署。
Calling Smart Contracts
We will complete the minting and transfer process in the ERC20 contract deployed in the previous step
- 1, Go to the console and click on the console button in the top right corner as shown below:
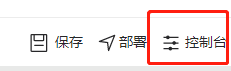
The console page is shown below:
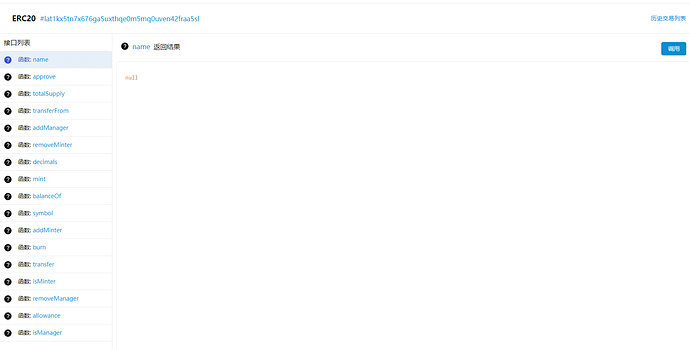
- 2, Add a minter. Find the addMinter interface in the list of interfaces, as follows:
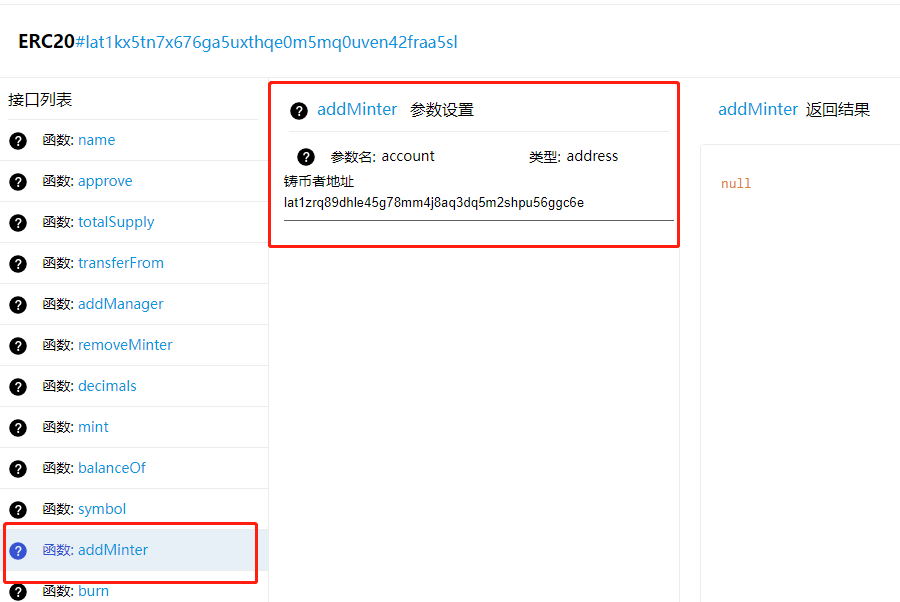
在输入框中,输入铸币者的地址,这里直接输入当前账号的地址。
Click on the Call button on the right to start the call to the smart contract, which returns the following result.
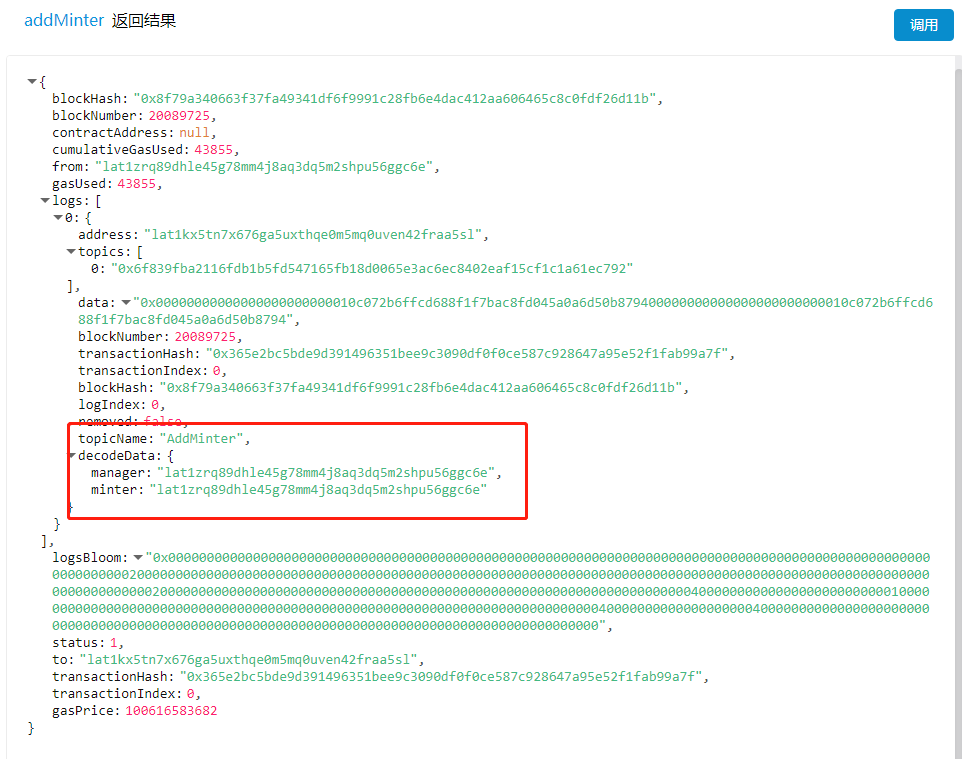
The Event data in the returned result has been parsed, as shown in the red box section above. Clicking on the list of historical transactions allows you to view the history of transactions called for this contract, as follows.
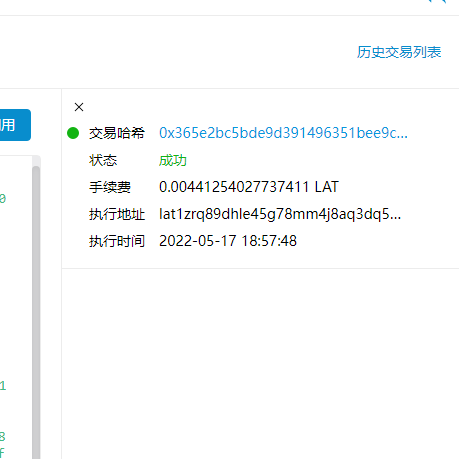
Click on the transaction hash in the diagram to jump to the transaction details page, as follows:

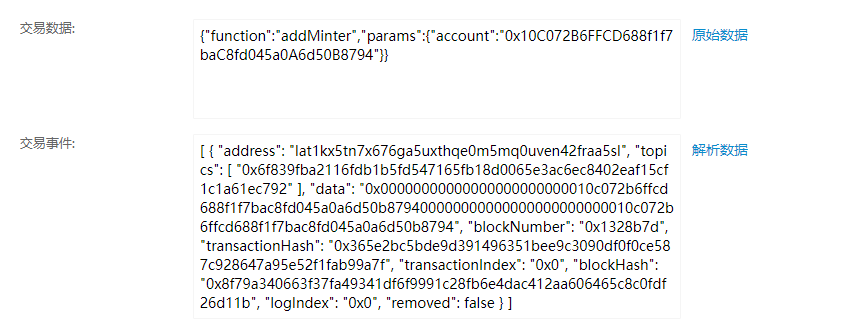
To view information on transaction data and events, you can parse the data by clicking on the Parse Data button next to it, as shown below.
- 2, Mint. Find the mint interface in the list of interfaces, as follows.
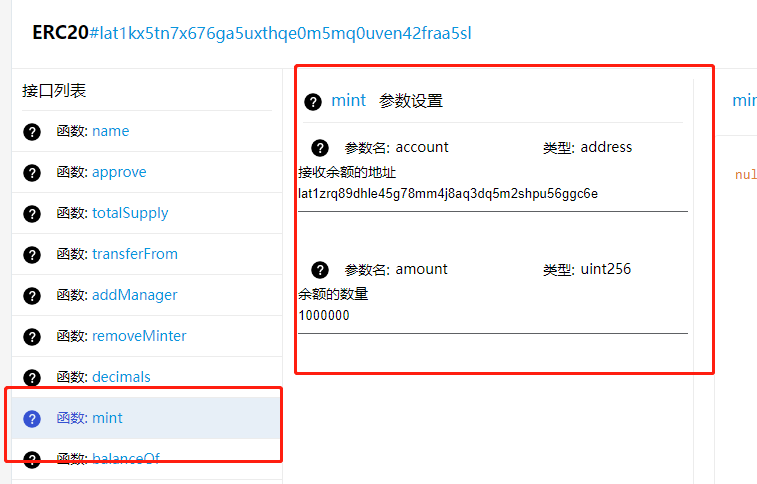
在参数设置中,输入接收铸币的地址以及币的数量,然后点击调用,即可完成铸币。
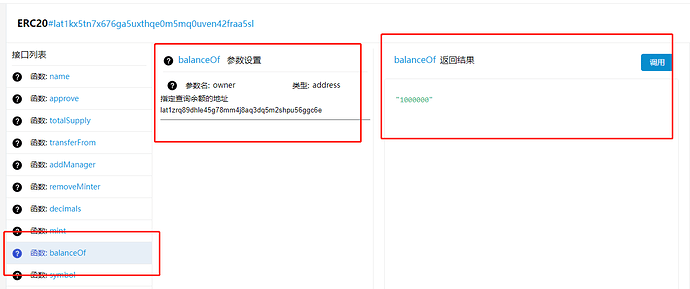
- 3, Check the balance. Find the balanceOf interface in the list of interfaces to find the balance of the address, as follows.
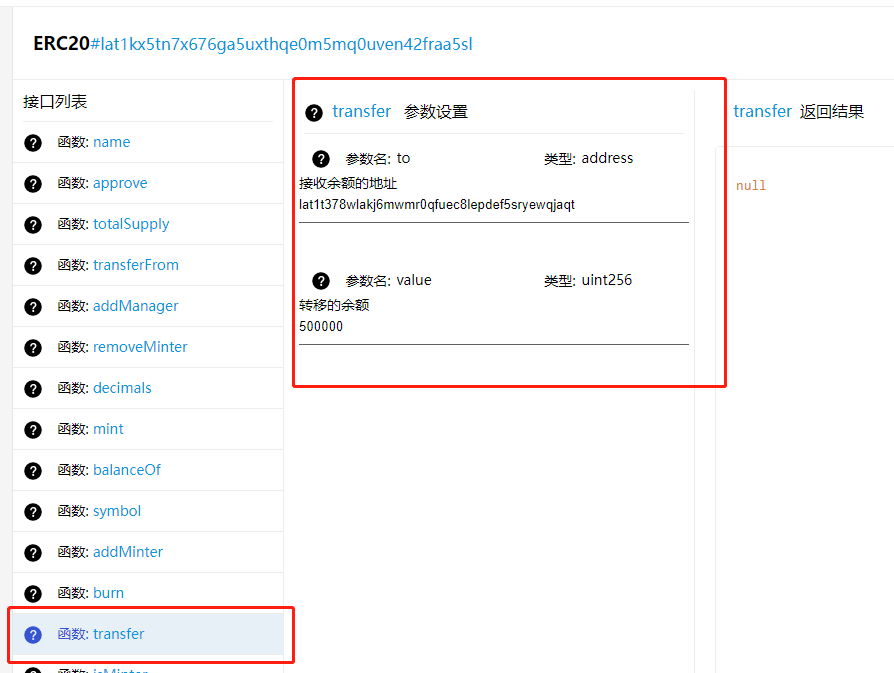
- 4, To transfer funds, find the transfer interface in the list of interfaces, fill in the address to receive the transfer and the amount to be transferred, and click on the call button to transfer funds, as follows.
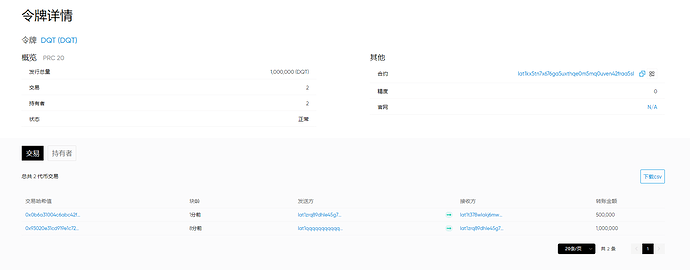
- 5, the blockchain browser information is as follows.
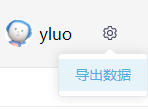
Exporting data
All of Astro’s data is saved in the browser plugin, if you need to save it yourself, you can export the data by clicking on the Export Data button in the top right corner, as follows.
A dialog box as shown below would:
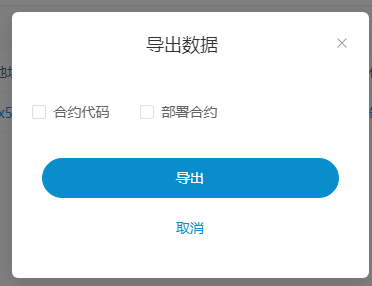
The data that can be exported are.
- Contract Codes: This option will export all contract codes in My Contracts
- Deploy Contract: This option will export information about the deployed contract, including the contract address, deployment hash, abi, etc.
- Account list: This option is checked by default and will export all current account information
When the export is clicked, the astro.dqt file is generated, as follows.
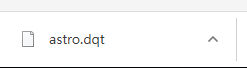
该文件的使用了Base64进行编码
Importing data
Data can only be imported after the plugin has been installed and during the step of setting a password. After the plug-in has been installed, the Set Password button appears on the home page. Click on this button and the Set Password dialog box appears, click on the Import Data option, as follows.
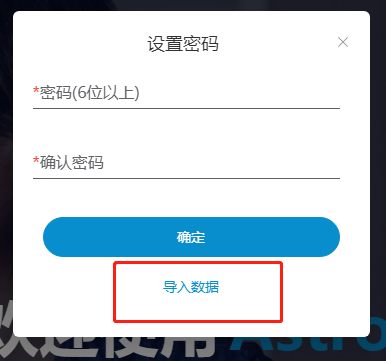
The Import Data button will pop up, as follows: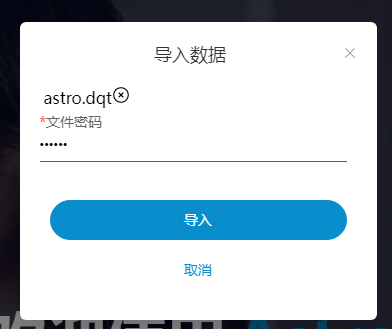
Enter in this dialog box, select the exported data file and the previous unlock password, then click Import to go to the main page.
The subsequent “Smart Contracts for PlatON Application Development with Dex” will be based on Astro.
This article is reproduced from https://forum.latticex.foundation/t/topic/6265