In this chapter, we will learn the functions of wallet transfer and query transaction records. Due to the variety of contents, it would be divided into two chapters.
Build Master Page
Create main-page.vue file in the page director. Part of the code is as follows:
<template>
    <div class="main-outer-page">
        <div class="main-page vertical-only-layout">
            <div class="horzontal-layout flex-center ">
                <header-bar />
                <span class="flex-1"></span>
                <div class="network-component horzontal-layout flex-center">
                    <span style="background:#e91550" class="circle-dot"></span>
                    <span class="network-name">PlatON测试网</span>
                </div>
            </div>
            <div class="vertical-layout main-container ">
                <div class="horzontal-layout menu-bar ">
                    <div class="flex-1"></div>
                    <div class="vertical-layout flex-1 flex-center ">
                        <span class="account">{{ accountName }}</span>
                        <span class="address">{{ address }}</span>
                    </div>
                    <div class="flex-1"></div>
                </div>
                <div class="wallet-overview vertical-layout-center">
                    <img src="@/assets/logo.png" class="logo" />

                    <div class="horzontal-layout flex-center currency-container">
                        <span class="currency" style="margin-right:6px;">{{ lat }}</span>
                        <span class="currency">LAT</span>
                    </div>
                    <el-button type="primary" round @click="onJumpToSendLatPage">
                        <i class="el-icon-position"  ></i>
                        发送</el-button
                    >
                </div>

                <div class="horzontal-layout tab-bar">
                    <div
                        @click="onChangeTab(0)"
                        class="flex-1 horzontal-layout  flex-center tab"
                        :class="`${tabIndex === 0 ? 'active' : ''}`"
                    >
                        交易记录
                    </div>
                    <div
                        @click="onChangeTab(1)"
                        class="flex-1 horzontal-layout flex-center tab"
                        :class="`${tabIndex === 1 ? 'active' : ''}`"
                    >
                        交易列表
                    </div>
                </div>

                <div class="transaction-record-container" v-if="tabIndex === 0">
                    <transaction-table :address="address" />
                </div>

                <div class="transaction-record-container" v-if="tabIndex === 1"></div>
            </div>
        </div>
    </div>
</template>
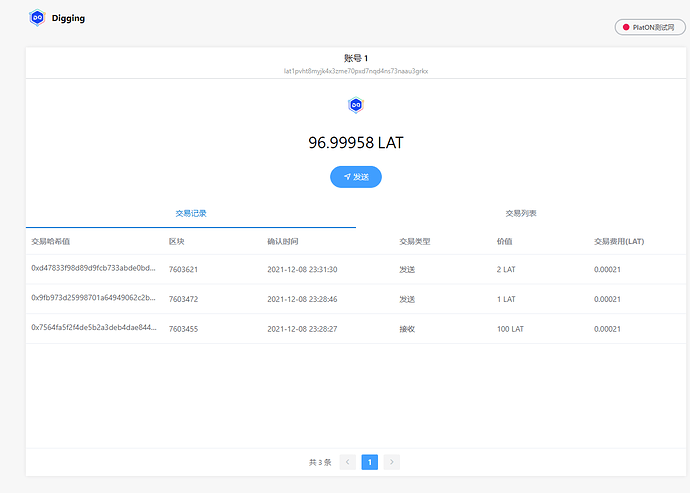
The page is as follows:

The transaction record table is extracted into a Vue component, transaction-table.vue, and placed in the component directory on this page, which can reduce the code of main-page.vue and better maintain.
Next, build the page to send lat
Build a Page to Send LAT
Create send-lat-page.vue file in the page director. Part of the code is as follows:
<template>
    <div class="send-lat-page vertical-only-layout">
        <header-bar />
        <div class="go-back" @click="onGoBack">< Back</div>
        <page-title>发送LAT</page-title>
        <el-form ref="sendForm" :model="sendInfo">
            <el-form-item
                prop="toAddress"
                label="接收地址"
                :rules="[
                    {
                        required: true,

                        validator: ValidateAddress
                    }
                ]"
            >
                <el-input
                    class="send-input"
                    v-model="sendInfo.toAddress"
                    placeholder="请输入接收地址"
                />
            </el-form-item>
            <el-form-item
                prop="lat"
                label="LAT数量"
                :rules="[
                    {
                        required: true,
                        message: '请输入要发送的LAT数量',
                        validator: ValidateLAT
                    }
                ]"
            >
                <el-input
                    class="send-input"
                    type="number"
                    v-model="sendInfo.lat"
                    placeholder="请输入要发送的LAT数量"
                />
            </el-form-item>

            <el-form-item label="所需手续费">
                <el-input disabled class="send-input" v-model="sendInfo.gasfee" />
            </el-form-item>

            <el-form-item>
                <div class="horzontal-layout">
                    <span class="flex-1"></span>
                    <el-button class="create-btn" @click="onGoBack">取消</el-button>

                    <el-button class="create-btn" type="primary" @click="onSend">发送</el-button>
                </div>
            </el-form-item>
        </el-form>
    </div>
</template>
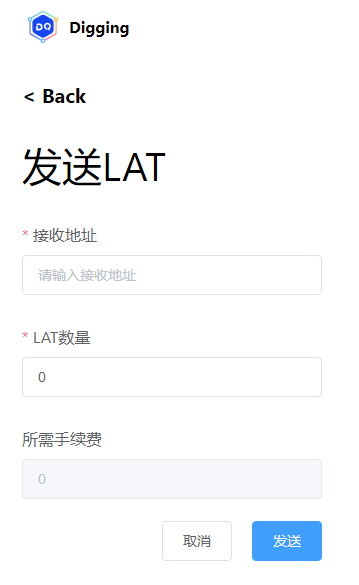
The page is as follows:
Write the Logic of the Master Page
Open the file background.js, add the code of transactionmanager Some codes are as follows:
/**
 * 交易管理类
 */
class TransactionManager {
    static web3; // Web3 实例

    static chainId = "210309"; // 测试网的chainId

    static getWeb3Ins() ;

    /**
     * 获取余额
     * @param {钱包地址} address
     * @returns
     */
    static async GetBalanceOf(address);
    /**
     * 判断是不是有效的钱包地址
     * @param {} address
     * @returns
     */
    static IsBech32Address(address) ;
    /**
     *
     * @returns 获取当前gas的价格
     */
    static async GetGasPrice();
    /**
     * 发送lat
     * @param {lat数量} lat
     * @param {接收地址} toAddress
     */
    static async SendLATTO(lat, account, toAddress);
}
This class mainly encapsulates the API in Chapter 2 Functions:
- Get Balance Of
- Is Bech32 Address
- Get Gas Price
- Send LATTO
Next, fix the BUG imported into the wallet. Find the StorePrivateKey function of PrivateKeyManager. Here, we need to judge whether the private key starts with 0x. If not, we need to add it, otherwise the generated address is incorrect
Codes as below:
   static async StorePrivateKey(account, privateKey, force) {
        if (!privateKey.startsWith("0x")) {
            privateKey = "0x" + privateKey;
        }

        // 强制导入的话,会把之前的私钥全部删除
        if (force) {
            chrome.storage.local.remove(PrivateKeyManager.privateKeyName);
        }
... 省略代码
}
After writing the transaction management class,open the file main-page.vue to obtain the information of the currently selected wallet. The code is as follows:
... 省略代码
        /**
         * 显示当前钱包信息
         */
        async getCurAccount() {
            // 调用PrivateKeyManager获取当前选中钱包
            let res = await this.digging.PrivateKeyManager.GetAccountInfo();
            if (res === null) {
                this.$message.error("当前无账号,请导入钱包或者创建钱包");
                // 3s后跳转界面
                setTimeout(() => {
                    this.$router.push("/select-action-page.vue");
                }, 3000);
                return;
            }

            this.accountName = res.accountName;
            this.address = res.address;
            // 获取钱包的余额
            this.getBalanceOf();
        },
... 省略代码
Then we need to get the balance of the wallet. The code is as follows:
... 省略代码
 /**
 * 获取lat
 */
async getBalanceOf() {
     this.lat = await this.digging.TransactionManager.GetBalanceOf(this.address);
}
... 省略代码
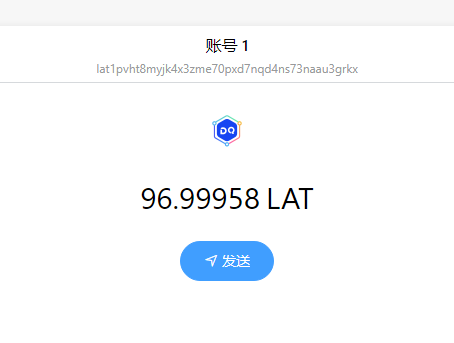
So we can get the balance of our wallet The effects are as follows:
:
Write and send logic of LAT
Openthe file send-lat-page.vue. Some codes for sending lat are as follows:
        /**
         * 执行发送的动作
         */
        async doSend() {
            let res = await this.digging.TransactionManager.SendLATTO(
                this.sendInfo.lat,
                this.account,
                this.sendInfo.toAddress
            );
            if (res.errCode !== 0) {
                this.$message.error("发送失败!");
                return;
            }

            this.$message.success("发送成功!");
            this.onGoBack();
        },
It should be noted here that we need to write the wallet legitimacy verification function. The code are as follows:
        ValidateAddress(rule, value, callback) {
            if (!this.digging.TransactionManager.IsBech32Address(this.sendInfo.toAddress)) {
                callback(new Error("请输入合法的地址"));
                return;
            }
            callback();
        },
Here we used IsBech32Address of TransactionManager for verification.
Next, use the function we wrote to execute the first transfer:
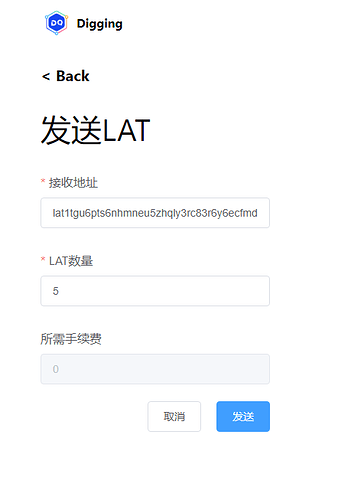
Note: the required service charge display function has not been completed in this chapter, so it is temporarily displayed as 0
After sending, we can view the transaction record, as shown in the following figure:

Build a Page that Displays transactions
As mentioned earlier on this page, the author draws it into transaction-table.vue, Vue, put it in the component directory, and some codes are as follows:
<template>
    <div class="tx-record">
        <el-table :data="datas" style="width: 100%" height="400">
            <el-table-column prop="txHash" label="交易哈希值" width="250">
                <template slot-scope="scope">
                    <span class="ellipsis">{{ scope.row.txHash }}</span>
                </template>
            </el-table-column>
            <el-table-column prop="blockNumber" label="区块"> </el-table-column>

            <el-table-column label="确认时间" width="240">
                <template slot-scope="scope">
                    <span>{{ timestampToStr(scope.row.timestamp) }}</span>
                </template>
            </el-table-column>
            <el-table-column prop="address" label="交易类型">
                <template slot-scope="scope">
                    <span>{{ getTXType(scope.row) }}</span>
                </template>
            </el-table-column>
            <el-table-column prop="value" label="价值">
                <template slot-scope="scope">
                    <span>{{ scope.row.value }} LAT</span>
                </template>
            </el-table-column>
            <el-table-column prop="actualTxCost" label="交易费用(LAT)"> </el-table-column>
        </el-table>
        <div class="horzontal-layout flex-center tx-record-footer">
            <el-pagination
                class="table-pager"
                background
                layout="total,  prev, pager, next"
                :total="totals"
                :page-size="20"
                :current-page.sync="curPageIndex"
                @current-change="loadData"
            ></el-pagination>
        </div>
    </div>
</template>
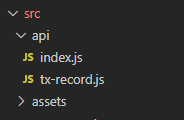
We need to get transaction records. We don’t have them in the SDK. We need to go to the official website to get them. At this time, you need to write an HTTP interface Create the API directory under the SRC directory Then add tx-record.js and index.j, as shown below:
The code of tx-record.js are as follows:
import axios from "axios";
const txRecorcdService = axios.create({
    baseURL: "https://devnetscan.platon.network/browser-server",
    timeout: 30000,
    withCredentials: true
});

txRecorcdService.interceptors.response.use(
    response => {
        return response.data;
    },
    error => {
        Message.error(error.response.data.errMsg);
        return Promise.reject(error)
    }
);

export default {
    /**
     * 获取交易记录列表
     * @param {*} params
     * @returns
     */
    GetTransactionListByAddress(params) {
        return txRecorcdService.post("/transaction/transactionListByAddress", params);
    }
};
这里用到了axios这个http库.
The code of index.js are as follows :
import txRecord from "./tx-record.js";
export default {
    txRecord
};
The file index.js is act as the entry file. Then open file main.js, add the following code to register the http api to the global object:
... 省略代码
import api from "./api";
... 省略代码
installPlugin(api, "api"); // api注册到全局
... 省略代码
Then open the file manifest.json, add the following under permissions: https://devnetscan.platon.network/browser-server/ As the picture shown:
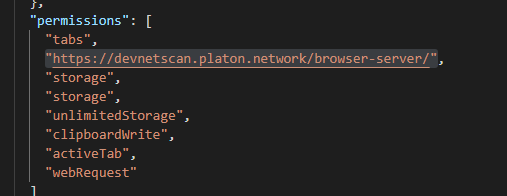
Because the address of the official website is a cross domain request, you need to apply for permission.
The code for obtaining transactions is as follows:
... 省略代码
       async loadData() {
            let res = await this.api.txRecord
                .GetTransactionListByAddress({
                    address: this.address, // 钱包地址
                    pageNo: this.curPageIndex, // 当前页面
                    pageSize: 20, // 每页显示的行数
                })
                .catch(e => {
                    console.log(e);
                });

            if (res.code !== 0) {
                this.$message.error(res.errMsg);
                return;
            }
            this.datas = res.data;
            this.totals = res.totalCount;
        }
... 省略代码
The results returned by this interface are shown in the figure below:
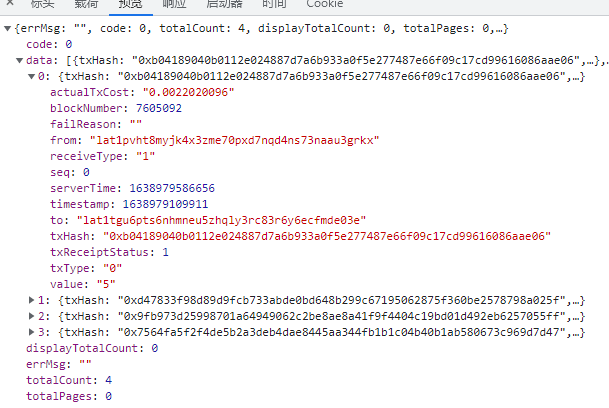
Some Important Fields:
- Total Count
- Actual Tx Cost
- Block Number
- Server Time
- Timestamp
- tx Hash
- From: the wallet address of sender
- To: the wallet address of receiver
- txType: Type 0 indicates the transfer function. If the from field is your wallet address, it means sending lat, otherwise it means accepting LAT. Type 1 means Create Contract and type 2 means Execute Contract
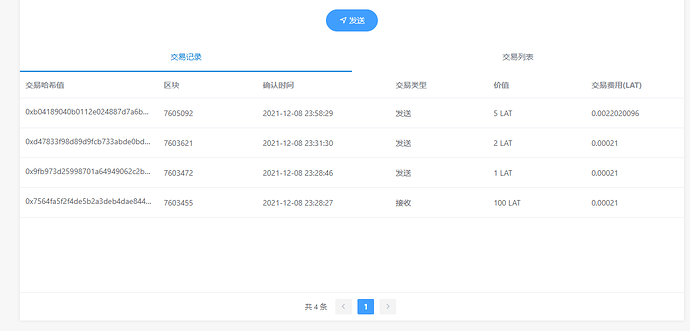
The final effect is as follows:
Well, that’s all for this chapter. The next chapter continues to complete the transaction list and the function of detecting whether the transfer is successful.
The URL of github: https://github.com/DQTechnology/Platon_DevGuideProject
This article is reproduced from https://forum.latticex.foundation/t/topic/5880